translate me!


Thursday, November 30, 2006

Penuche? What is Penuche???


That is a really good question. My Mother used to make Penuche, and I still really didn't know what it was until I was a bit older (I'm guessing as a silly child I veered clear of Penuche because it wasn't chocolate fudge). I certainly have never tried to make it until yesterday and 
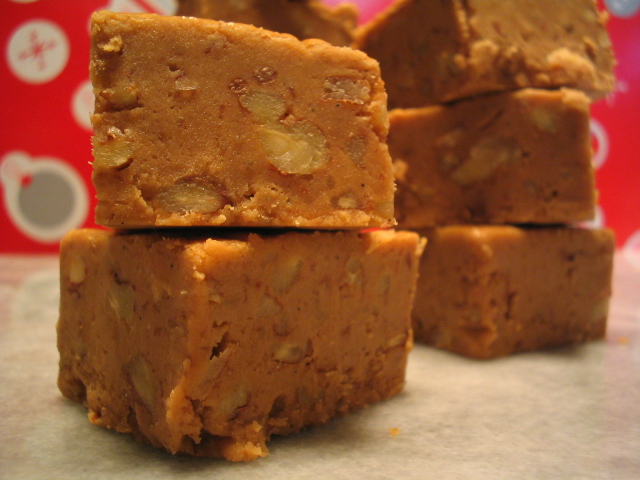
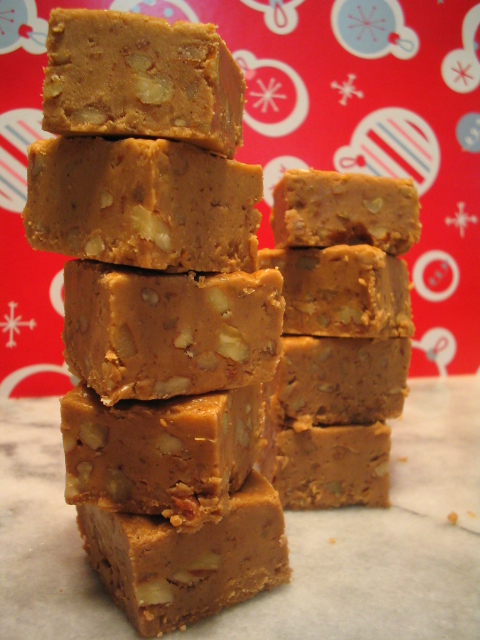
I really wish I had tried it sooner. It is creamy smooth almost caramel-y with the consistency of fudge. Technically speaking, it is a fudge. Your arm will feel like it is going to fall off while you are stirring this, so it is best to make it when you have someone else available to stir a bit for you (or, if all else fails, use your mixer). This is made using the same method I used for the Pumpkin Fudge(which I think would also be great as a holiday gift). This Penuche is just brown sugar-pecan-a-licious. I found the recipe in the Joy of Cooking book. I hope you will enjoy it as much as I am.

Penuche: (yields one 8x8" pan, cut into 36 squares)

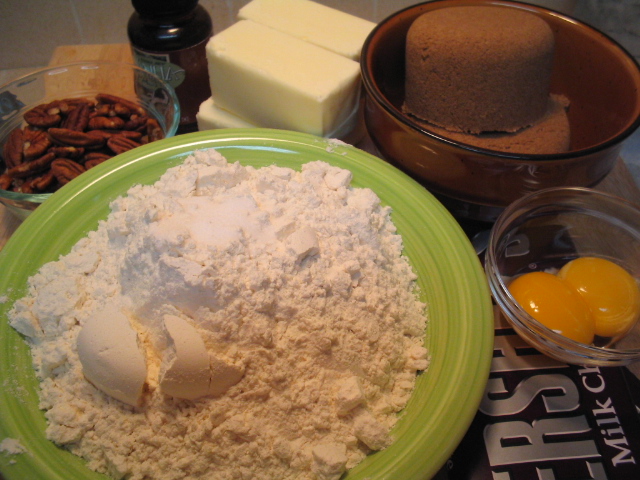
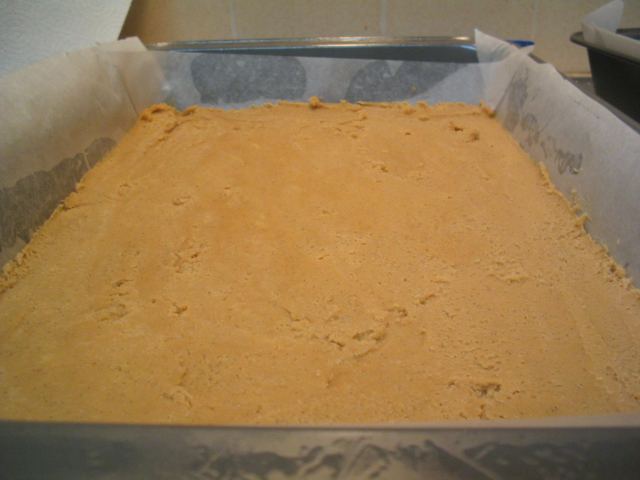
Prepare an 8x8" pan by lining it with parchement or foil and lightly coating that with butter or pan spray (the recipe also states that you can drop this candy by tablespoonsful onto parchement paper instead of doing a big hunk of it). In a large heavy bottomed sauce pan, bring to a boil, stirring constantly:
3 cups brown sugar
1 cup heavy cream
1/4 tsp salt
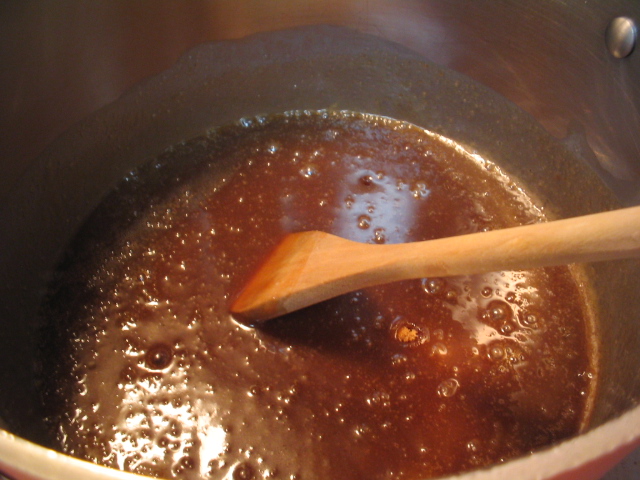
-Once this mixture is boiling, cover the pan and cook for about 3 minutes, or until the steam has washed down any excess sugar crystals from the side of the pan (I did this and as an extra precaution washed down the sides with a brush and some water as well)
-Uncover and cook slowly, without stirring, until the temperature is 238f or soft ball stage, remove from heat and add:
2 Tbsp butter
-Cool to 110f
Add:
1 tsp (or 2 tsps if you are a vanilla freak) vanilla (or vanilla bean paste, yum)
-Stir like a mad person, once you have stirred quite a bit and have lost almost all feeling in your arm, add:
1 cup pecans (or more if you like)
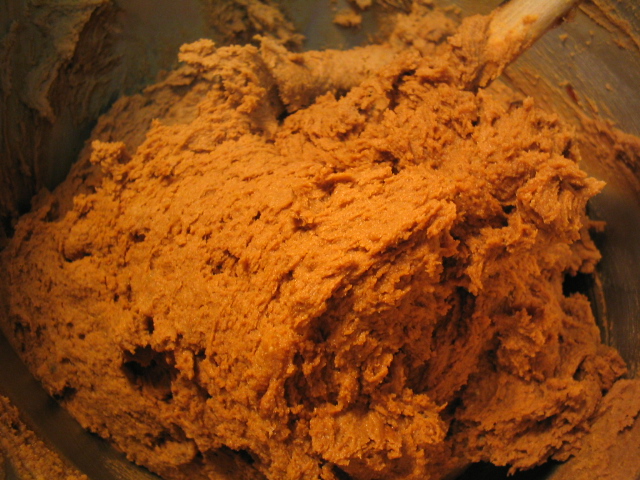
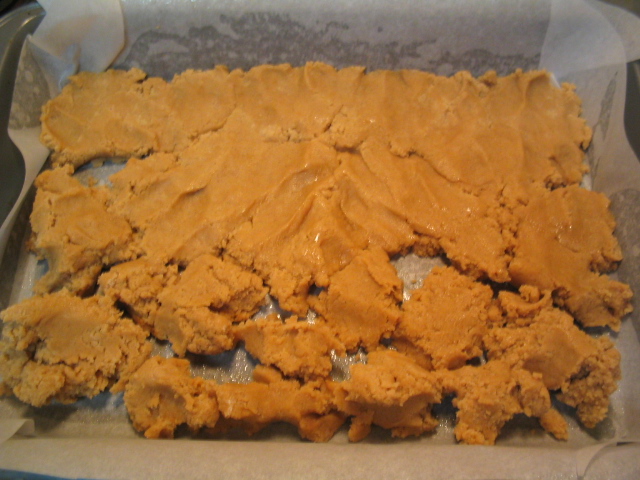
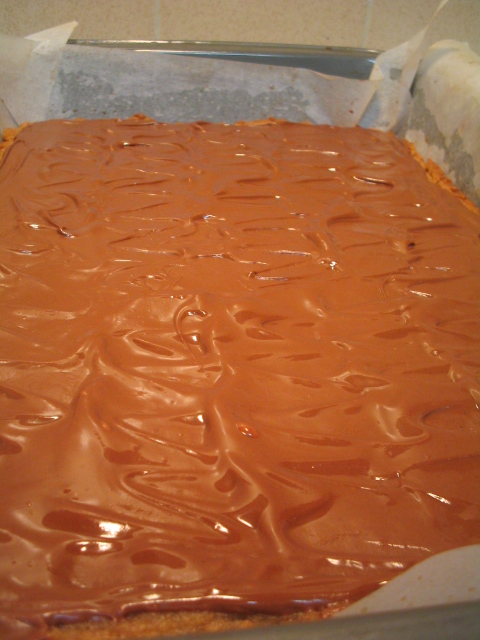
-Stir a bit more, you want to stir until it loses it's gloss and is smooth and creamy. Turn out into the prepared pan, spread the mixture out, and let it cool and solidify.

MMMmmmmmmm! Very good stuff. It is very very rich and very sweet, but it's the holidays, so it's ok!
Have fun with this! Rest your arm! Beware hot sugar! Happy Candy Making!


Technorati Tags:, rel="tag">fudge, , , , , , , ,
Generated By Technorati Tag Generator

Wednesday, November 29, 2006

Three Times the Ginger = Three Times the Yum! (Holiday baking, part three)


If you love ginger as I do, these are the cookies for you. I remember the first time I had these cookies. A classmate of mine, in the Baking and Pastry program, came into one of our not-so-hands-on classes (I think it was nutrition) and handed these cookies to each of us. The recipe was wrapped around the cookie (at least, that's how I am remembering it). The first bite was heaven.
Sharp ginger flavor with strong molasses tones and the mellowing flavor of butter in the background. These are close to the top of my list of favorite cookies. Before these cookies came along, I was making cut out decorated gingerbread men for my cookie gifts...after these cookies,
the gingerbread men were out of the picture. Not that I don't delight in a yummy frosted gingerbread man, but I make a huge amount of cut out decorated sugar cookies and figured I could cut out the gingerbread men without anyone objecting. And who could object, with these cookies in their place? Yum. Now I will stop myself just short of singing the praises of these cookies ad nauseum and get on with the recipe.

Triple Ginger Cookies: (should yield about 5-6 dozen cookies depending on the size you make them...maybe more, could be less)

3/4 cup butter, room temperature
1 cup dark brown sugar (really, you can use light brown sugar if that's what you have)
1/4 cup molasses (if you want to use a little more molasses, just add a little more flour)
1 egg
2 1/4 cups flour
2 tsp. ground ginger
2 tsp. baking soda
1/2 tsp. salt
2 Tbsp. peeled, grated ginger root (mmmmmmmmmm)
1/2 to 3/4 cup diced crystallized ginger (I tend to go for a heavier amount because, and I'm not sure I mentioned this, I love ginger)
_____________________________
-Cream together the butter and brown sugar.
-Add molasses and egg to the butter mixture and mix until blended.
-Add the flour, ground ginger, baking soda and salt and mix until it just starts to come together, then add the fresh and crystallized ginger. Mix thoroughly.
-Place the dough in a bowl (or I use a gallon freezer bag) and chill overnight. Because this is such a soft dough, the chilling is necessary.
The next day:
-Preheat oven to 350f, Prepare cookie sheets with either a spritz of pan spray or line them with parchement paper.
-Remove the dough from the fridge and roll the dough into little balls (I do them very small, about 1/2 inch around) and then coat 3/4 of the ball with granulated sugar (the reason I only do 3/4 and not the whole thing, is so the bottom of the cookie doesn't burn from too much sugar coating it). Place cookies on the sheet pan sugar free side down. Bake 6 to 8 minutes, or until done. I like these a bit chewier, so I bake them for 6 minutes. I think you could probably bake them for 10 minutes or longer if you want a crisp cookie (just keep a close eye on them).
-Cool cookies and enjoy (or stack them into little cityscapes and take pictures of them if you are a nut job like me) Mmmmmmm.
Happy Snappy Ginger baking!


Technorati Tags:, , , , , , , , ,
Generated By Technorati Tag Generator

Technorati Tags:,
Generated By Technorati Tag Generator

Ginger, Three Ways....


I'll be posting some ginger cookies shortly.......


Technorati Tags:,
Generated By Technorati Tag Generator

Monday, November 27, 2006

Toffee Bars (Holiday Baking, Second Installment)


Toffee bars are a bit like the Seven-Layer bars from my last post in that they require little effort and taste so good. These are another great way to ease into holiday baking. I love the way these bars fill our apartment with the smell of butter, brown sugar and flour baking. Mmmmmm. I believe if someone could accurately bottle that scent, they would be rolling in the dough (yes, bad pun intended). These are also a holiday staple for my cookie gifts. People love them. I believe the secret to their appeal is their simplicity. Sometimes I wonder why I only make them this time of year...hmmmmmm.

Toffee Bars (yields one 9x13" pan of bars)
1 cup (8 ounces or 2 sticks) unsalted butter, room temp (sorry I missed this in the original post, my brain must have been somewhere else)
1 c. packed brown sugar
1 egg yolk
2 tsp. vanilla (extract is fine, I used my vanilla bean paste which I just love...I think I've mentioned that I am a vanilla freak before)
1/2 tsp. salt
2 c. all-purpose flour
5 ounces milk chocolate (I just use a 5 ounce Hershey's Bar, it breaks up nicely and melts quickly)
1 cup chopped pecans (or walnuts, or macadamias, or whatever you like)
______________________________________
-Preheat oven to 350f. Prepare one 9x13" pan by spraying with pan spray and lining it with parchement paper (this makes it very easy to remove the bars from the pan without cutting them, and makes storage easy as well).
-Cream butter and brown sugar until it is a bit fluffy (about 5 minutes or so). Add the vanilla and egg yolk and mix until blended.
-Add the flour and salt and mix until combined.
-Plunk the dough in bits in the bottom of the prepared pan and then flatten the dough with your hands to create an even layer of the dough (I spray my hands with a little pan spray to keep the dough from sticking, and once I have it all smooshed out into the pan, I smooth the dough with a little offset spatula).
-Bake for about 20 minutes, or until the bars have a lightly browned crust formed on top (the insides will still be soft when you press on the crust).
-Immediately break up your Hershey's Bar and place the blocks of chocolate on top of the hot cookie base,
wait about 5 minutes until they are melty (it's neat, they melt and yet still hold their shape and say "Hershey's), then spread out the chocolate in a nice layer over the top of the bars. If you are using milk chocolate chips or other milk chocolate, just sprinkle over the hot cookie base and do the same.

-Sprinkle the top of the bars with the chopped nuts, cool and then cut as you please, or these can be stored in the freezer uncut until the time you need them (I wouldn't recommend storing them longer than a month in the freezer).

Take a moment while these are baking to inhale the scent and relax a bit. You deserve it.
Happy Baking, stay tuned for more holiday cookie fun!


Technorati Tags:, , ,
, , , , , , ,

Generated By Technorati Tag Generator

Sunday, November 26, 2006

Easing into it with Seven Layer Bars (Holiday Baking, Part One)


As I said in my last post, I like to give home made cookies as gifts during the holiday season. I feel it is a very personalized kind of gift to give. It takes a little bit of thought (ok, I admit, I do work on my list of cookies to bake for probably longer than I should, but I'm a list freak. You'd think with my love of lists that I'd be more organized, ah well) and the end product tends to be appreciated by everyone. I give quite a few cookies to the people on my gift list so that they can share them, because that's what the holidays are all about, aren't they? Sharing.

These cookies are my way of kick-starting my holiday bake-off. They are easy. They are very good, almost more of a candy than a cookie. I'm sure most of you have seen them, and many of you have probably made them. Seven layer bars are just that. Seven layers of goodness baked to a nice chewy golden brown and sliced into whatever shape you like (I prefer little triangles or squares). These are very much a part of my holiday baking.

Seven Layer Bars (yields one 9x13" pan)
1 stick (4 ounces) unsalted butter (I do always use unsalted butter in all my baking)
1 1/2 cups crushed graham crackers (or graham cracker crumbs)
1 cup chocolate chips (semi-sweet are my favorite)
1 cup butterscotch chips (I've never tried peanut butter chips in these, but they might be yummy)
1 cup chopped nuts (I used pecans, as I always seem to do. Walnuts or any other nut would work well)
1 1/2 cups shredded coconut (I do used the bags of sweetened coconut, I'm sure you could use unsweetened also, and if you do use unsweetened coconut, let me know how it is!)
1 1/2 cans (the 14 ounce cans) sweetened condensed milk (I know many recipes for this just call for one can, and you can do that. I just like the little bit of extra moisture the added 1/2 can gives these)
______________________________________________
-Preheat oven to 325f. Spray one 9x13" pan with pan spray and line it with parchement paper coming up the sides (This just makes it very easy to lift the bars out of the pan once they are cool)
-Melt the stick of butter in the bottom of the prepared pan (I do this on really low heat on the stovetop, you can also melt the butter in the microwave and pour it into the pan to avoid hot pan).
-Sprinkle the graham cracker crumbs over the melted butter. You may want to get in there with your clean fingers and mix these together to form the crust. Then press the crust evenly over the bottom.
-Sprinkle in chocolate chips, then the butterscotch chips
-Sprinkle (that is my word for the day I think) the nuts over the chips.
-Cast the coconut (hahaha...got ya didn't I? You thought I was going to say "sprinkle") over the top of the nuts, chips, and graham cracker.
-Pour the sweetened condensed milk evenly over the entire pan.
-Bake for about 40 minutes or so. I check every 15 minutes to see if the pan needs to be rotated (the back of my oven runs hotter than the front), I also start the pan out in the middle of the oven, and move it to an upper rack during the last ten minutes or so because I like the top of these to be nicely caramelized. Yum.
-Cool in the pans on racks until the bars are just warm. Lift the bars from the pan and continue to cool on the racks.
-You can cut these once they are cool if you like. These bars do freeze well and I use this to my advantage. I just cut the entire batch of bars in half, put a layer of parchement between the halves and freeze them like this in a gallon sized freezer bag until the time has come for me to package all my cookies for shipping. When I need them, I pull them out, cut them frozen and pack them up. Very easy.

Happy Holiday Baking, stay tuned for more cookies and candy in the next few weeks...


Technorati Tags:, , , , , , , ,
Generated By Technorati Tag Generator

Saturday, November 25, 2006

Holiday Baking


It's been awhile since I've blogged anything, but fear not, I will be blogging many things very soon. I am beginning my holiday baking, which is a huge undertaking (well, not really huge, but I do make quite a few cookies). I love giving people gifts that I have made myself, so I tend to bake more cookies this time of year than I do the rest of it. I am in the process of making and chilling/freezing dough to be baked in a week or so. I will be sharing all of this with you in the next few weeks. I'm hoping to post a few cookies each week as I mix and bake them. So, something to look forward to this holiday season! This is my rather long-winded way of saying "Cookie recipes coming soon".

Thursday, November 16, 2006

Cranberry-Orange Bread! (Quickbread, really..)


First, I must apologize for my lack of activity here on the Barmy blog. I've had a few things on my mind lately and this has caused a bit of slacking in the photo-taking-food-writing area of my life. I do hope I will be back more frequently.

Cranberry bread is another of my favorite seasonal baked goods. I love the way that bright tart cranberries and lovely acidic oranges compliment each other. My mom always made loaves of Cranberry Bread for us kids to take to our teachers this time of year. I believe they were much appreciated. The recipe she used (and still does use) was the recipe from the back of the bag of cranberries, and this is the recipe that I still use and love. The only things I've really changed are: I've upped the amount of orange zest (cause I loves the orange zest) and I use butter instead of shortening (everything is better with butter, right?). This is a wonderful bread to add to your Thanksgiving, Christmas, or other Holiday feasts. It rocks alone or with a slathering of butter. Mmmmmmmm.

Cranberry Orange Quickbread: (I doubled this to yield 3 smaller loaves, the recipe as given here yields one 9x5" loaf)

2 cups flour
1 cup sugar
1 1/2 tsp baking powder
1 tsp salt
1/2 tsp baking soda
3/4 cup orange juice
2 Tbsp butter, melted and cooled
2 Tbsp minced orange zest
1 egg, beaten
1 1/2 cup cranberries, halved
1/2 cup chopped nuts (I used my usual pecans)
____________________________________________
-Preheat oven to 350f. Grease one 9x5" loaf pan.
-In a large bowl, combine the flour, sugar, baking powder, baking soda and salt.
-To the dries add the orange juice, orange zest, egg, and butter. Mix until the it just starts to come together and add the cranberries and nuts. Mix just until the cranberries and nuts are distributed throughout.
-Scrape the batter into the prepared loaf pan (it takes a whole lotta restraint to keep me from eating the batter, yum).
-Bake for 45 minutes or until a toothpick inserted comes out clean.
-Cool, spread with butter or eat naked and enjoy.

The cranberry bread is baking as I type this, and I realized that I made a boo-boo. I switched my amounts of the baking powder and soda. Don't you be silly and do this too! Well, we shall see what happens. I'm going to guess that I'll get less of a nice rise and more of a spread-out top on the loaf (and I'm going to guess that I'll be kicking myself about this for the next few hours). I'm hoping the taste isn't too baking soda-y. This is why the Barmy Baker shouldn't bake when there are too many things on her mind :). I'll post the picture of the way the loaves turned out, so you can see how you don't want yours to look.

Hope you enjoy! Happy Baking!

Note the flat tops. Yours will turn out beautifully with slightly domed tops, because you will be paying attention to what you are doing unlike a certain Barmy Baker I could mention.....


Technorati Tags:, , , , , , ,
Generated By Technorati Tag Generator

Monday, November 13, 2006

Slacker, am I


Apologies for my lack of baking posts this last week, I am a terrible slacker! I'm working a few things out in my head. So, instead of pretty food pictures, I give to you pictures of the only plant that is currently blooming in my garden! The Hibiscus:


Monday, November 06, 2006

Meyer Lemon Loaf!


Now now....before you go saying "lemon? why, she must be barmy....it's fall, where are the cranberry and pumpkin loaves?"
I will explain (short version): my older sister got me a tiny little Meyer lemon tree for my birthday in July, the tree had four little tiny green lemons on it when it arrived, the past two weeks the little lemons have turned that wonderful color that Meyer lemons turn, and today I just had to pick them. The smell alone was enough to put me in a different place. The smell of sunshine packed into a nice yellow rind. These were small Meyer lemons, compared to the ones I have gotten at the farmer's market, but I don't care.
I grew them, they rock! Just look at those golden glowing beauties!

I found the recipe for the Lemon Loaf in my copy of Desserts by Pierre Herme. It yields two wonderfully tart loaves, a touch lighter than pound cake. He suggests putting a thin layer of lemon marmalade over the top once it is baked, and I bet this would be very good.
I just brushed the loaves with some lemon simple syrup once they came out of the oven this gave them a lovely sheen and a little extra pucker power. Mmmmm.

Lemon Loaves:
2 2/3 cups cake flour
3/4 tsp baking powder
Zest of three lemons, minced (I used my Meyer lemons, store bought lemons will be fine)
2 cups sugar
6 large eggs, room temperature
3/4 cup sour cream (the recipe calls for creme fraiche, this is what I had on hand) at room temperature
3 1/2 Tbsp rum (I didn't have any rum, so I used some fresh squeezed lemon juice, rum would probably be really good though)
pinch of salt
4 1/2 ounces butter, melted and cooled
1/2 cup sugar, 1/2 cup water, juice from one lemon (for the simple syrup) ______________________________
-Preheat oven to 350 degrees. Butter and flour 2 loaf pans, I used 7x3x2" or
something like that...they are the "disposable" aluminum ones that I never really dispose of), tap out excess flour.
-Sift together the cake flour and baking powder, set aside.
-Place the sugar and the lemon zest in a large mixing bowl, and rub together until the sugar is lemon scented and a bit clumpy. Add the eggs and beat with a whisk until the mixture is a light lemon color and thickened a bit.
-Whisk in the sour cream then the salt, then the rum.
-Gently whisk in the flour in four parts, then whisk the butter in in three parts. You will have a lovely thick yet pourable batter flecked with lemon zest.
Yum.
-Pour the batter into the prepared loaf pans and bake for about 55 minutes, or until the top doesn't sink in when lightly pressed. The tops of the loaves should split open beautifully revealing their creamy pale yellow innards.
-While the loaves are baking, boil together the sugar and water until the sugar is dissolved, remove from the heat and add the lemon juice.
-Turn the loaves out of their pans onto a cooling rack and brush liberally with the lemon syrup, repeat brushing as you feel necessary. Let cool. Make a nice cup of tea and enjoy.

Technorati Tags:, , , , , , , , ,
Generated By Technorati Tag Generator