translate me!


Thursday, August 31, 2006

Sick Day..or..a Bit More About Me


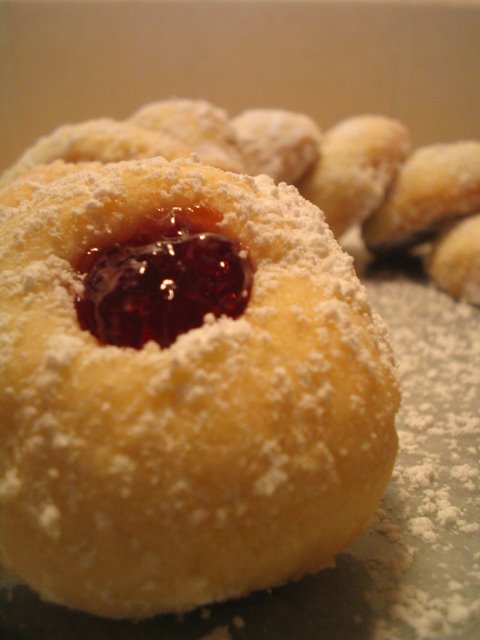
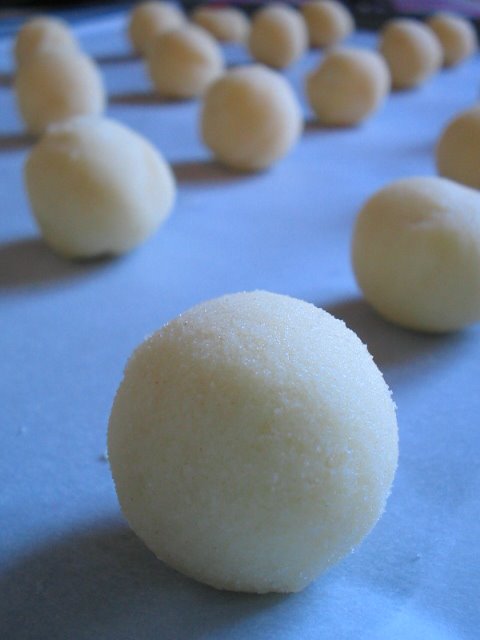
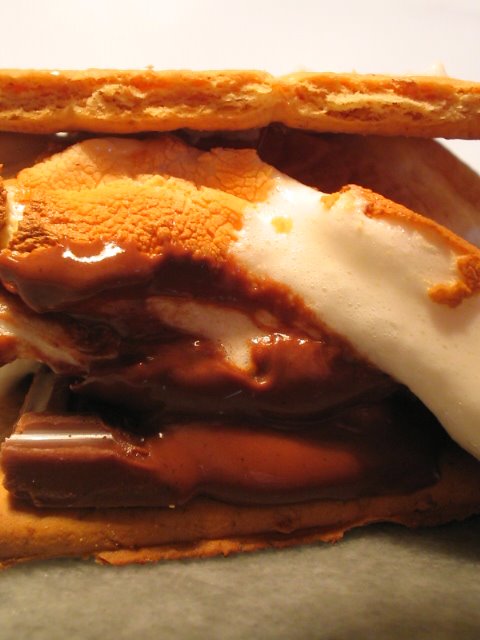
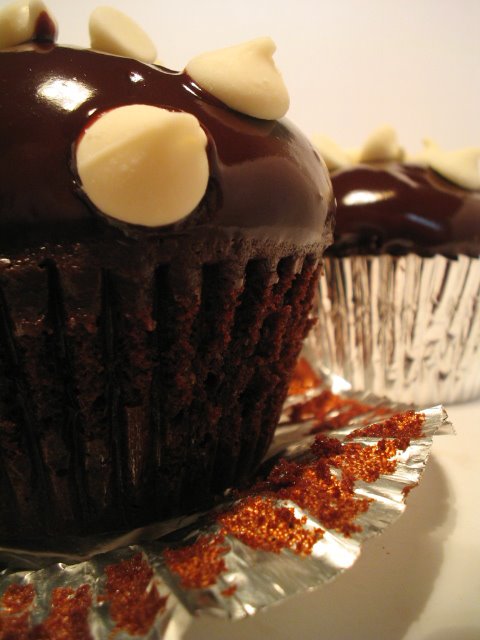
I'm a bit under the weather today, so I will not be baking. I feel I should post something, and my Mom has suggested I tell you a bit more about my background. I suppose I wasn't that thorough in the introduction that you can find at the bottom of this page...so I will try to give a short but sweet background of the eccentric baking chick and probably post a few pictures of stuff that I just really like.

What brought me to love baking? I suppose it's in my genes. No professional Bakers in my family except for me, but I think that just growing up with people who loved to cook and bake and did both well influenced me greatly. It also didn't hurt when I was given an Easy-Bake Oven at the age of, I think, 5 or 6. It didn't hurt at all, in fact. I'm not sure how many of the little packets of mix I went through but I'm sure it was a great many. From the Easy-Bake Oven I moved on to kitchen experiments. One crazy friend I had in grade school would help me with making candies. We made lollipops and pulled taffy. This was a great start. I moved on to popcorn balls. I would make lemon meringue pie with one of my friends. She would make the meringue, and I would make the filling, and we both would make the crust in turns. I think I may have had sleep issues...because when the rest of the house was sleeping, I was tinkering in the kitchen with different things. I also recall making white bread, having it turn out beautifully, only to have one sister (or was it both? fess up one of you!) eat the inside of the bread leaving a hollow crust. This horrified me as the crust was beautiful and I was so proud of my bread! I have gotten over that now :).

I went from the little baking projects to bigger ones. Making and decorating cakes for my friends in junior high and high school. I taught myself using Wilton cake tins and tips. I took a break from all this and went to college in pursuit of a degree in Art (which was another passion of mine). Things happened..as they sometimes do..and I ended up back home..without a degree and not much direction. Not sure what to do with myself I went back to work at the nursing home I had worked at as a teenager. A cook got fired, they offered me the job and offered to pay for culinary schooling. I jumped at the offer. Two years of culinary school later, I was cooking in a five diamond resort. Baking was still something I dreamed of doing, but I needed more experience if I was to work in the pastry department at the resort. In 1999,after another 2 years of working at the resort, I packed myself up and went from very small town Wisconsin to huge city San Francisco to attend the California Culinary Academy in hopes of a Baking and Pastry Certificate. It was awesome, I loved it. I felt in my element. About 6 months later I graduated, a Dean's list student, and was ready to go bake. And now for the really short summary...I baked for 2 years in the pastry department at the resort in Wisconsin. I moved on to a country club and multitasked there cooking and baking. Then I went on to just cook at a golf course in Wisconsin as it seemed there weren't many opportunities for bakers in the small town..at least nothing for a baker who wanted to advance. During all of this I fell in love, over a period of time, with a wonderful Englishman. Yes, it was an online courtship, but we had many visits to each other before G decided to move to Wisconsin and find himself a job. A few months later, G accepted a job here..in Silicon Valley, proposed marriage, I said yes, and then we loaded up the U-haul with our two kitties, and drove out here. I set up the apartment, G worked, and now I am seeking employment and have taken up writing here for my enjoyment and to showcase the food I bake and the photographs that I love taking of it. Now, I must apologize for the length here. It was definitely summarized..Much shorter with many dull things omitted! I hope you didn't fall asleep on me. Now it is time for me to go make some tea and curl up under a blanket and nurse myself back to some form of health. Have a wonderful day and thanks for reading!


P.S. I'm so happy that my Easy-Bake Oven still appears to work!

Tuesday, August 29, 2006

Sweetheart Cookies!


These are a wonderful gem of a cookie. A butter cookie to be exact. They fill the air with the scent of memories. There is nothing better than the smell of a butter cookie baking, you can try to argue with me on that, but I will stand firm. This is a recipe from my Great Aunt Gertie. My sisters and I would spend afternoons at her house, playing on the lawn that my Great Uncle Jim had planted entirely in putting green grass. She would give us fruit punch flavored soda and pretzels and other snacks and we would play cards and putt golf balls into a little holder. She is, without a doubt, the best baker in my family. She made these perfect itty bitty cookies. Always almost completely uniform in shape. This cookie is sweet, but not too sweet, and the currant jelly baked into the center gives a nice tartness as well as making them glisten like jewels. They are small enough to just pop into your mouth, but trust me, you will want to eat them slowly and savor their buttery delight. These are an excellent cookie to make for Christmas gifts but they also are great for tea or just as a small treat at the end of a hard day.

Sweetheart Cookies:'
3/4 cup butter
1/2 cup sugar
pinch of salt
1 egg yolk
1 1/2 cups A.P. flour
________________________________
-Cream the butter, sugar and pinch of salt for 10 minutes on low speed
-add the yolk and mix to blend
-add the flour and mix just until blended.
-Chill dough, covered in a bowl overnight.
The next day:
-heat oven to 350f
-roll dough into tiny little balls, less than an inch across.
-make a small indentation in the center of the balls (I like to use the handle of a smaller wooden spoon, or the wide end of chopsticks.....even your little finger will do).
-fill each indentation with currant jelly. I put a few tablespoons of the jelly into a plastic baggie and cut out the corner and use it to pipe in the jelly. It's much less messy than using a spoon.
-bake cookies for about 12 to 15 minutes, or until a bit golden around the edges.
-let cool for 5 minutes on the cookie sheet, then toss warm cookies in powdered sugar
-cool on rack and enjoy!

Technorati Tags:, , , ,
Generated By Technorati Tag Generator

Sunday, August 27, 2006

Gooooey Decadent Simplicity


Thy name is S'mores. Mmmmmmm. Upon learning that G, my lovely British fiance, had never had a S'more, we acquired the fixins for them yesterday on our weekly Saturday grocery trip. As we are having a few small ant issues outside, we decided to make the marshmallowy goodies indoors over the burner of our electric stove. I believe my mom taught me that trick, but she uses a fork. We had some chopsticks that worked quite well for roasting our marshmallows over the open red hot coil.
For a moment we felt like campers, braving the wilderness, the sounds of creatures all around us. Ok...maybe we didn't really...maybe we heard a car passing down the street. I am happy to report that G thought they were "quite nice" even if a bit sweet. I would have to agree about the sweetness, but when you are a kid around a campfire they sure do hit the spot! Marshmallows, chocolate squares, graham crackers and a little heat and you have nummy melty goodness. Who says you need a great big fire?

Saturday, August 26, 2006

Evil Chocolate Chocolate Chocolate Cupcakes!


Well...they aren't exactly evil, but G's coworkers have dubbed them just that. I believe his boss said he liked the way the chocolate "got" him in the back of the throat. I think I will take that as a compliment! These are serious chocolate cupcakes that will require a big glass of milk.

I was making these every year for the past few years for a friend's Halloween gathering. They were loved by her teenage son and his friends. I think they tried to eat as many as they could to see who could achieve a state of supreme sugar buzz! Unfortunately moving 2200 miles away will put an end to that tradition. But, never fear, I have a new audience to bake for..and I believe they are enjoying it.

The recipe is from Marcel Desaulniers' book Death By Chocolate, as usual, I have shortened the directions and they are in my own words. Happy Baking!

Serious Chocolate Cupcakes:
-10 semisweet chocolate, broken into pieces (10 ounces)
-8 heavy cream (8 ounces)
-2 unsweetened chocolate, broken into pieces (2 ounces)
5 eggs
½ cup sugar
1 tsp vanilla
¾ cup flour
½ tsp baking soda
2 cups semi sweet chocolate chips
_____________________________________________________
-preheat oven to 325f
-place broken chocolates and cream in double boiler, covered, for 10 minutes. Stir till smooth.
-Place eggs, sugar and vanilla in mixer w/paddle. Beat on medium until lemon colored and slightly thickened, about 4 minutes. Add chocolate, beat on med 15-20 seconds. Add baking soda, flour and chips, beat on low 10 seconds, increase to medium and beat 10 more seconds.divide into 18 muffin tins, fill ¼ inch below the rim. Baker about 25 minutes, cool..dip tops in icing and garnish with white or dark chocolate chips or curls or something pretty...I also will do seasonal sprinkles on these, such as: pumpkins at Halloween, Holiday M&M's at Christmas..etc....

Ganache topping:
-4 heavy cream (4 ounces)
-6 semi sweet chocolate (6 ounces)
__________________________________
-heat cream to boiling, pour over semi sweet chocolate. Let sit for about 8 minutes. Whisk until smooth and dip in cooled cuppycakes.

Mmmmmmmmmmmmmmmmmm chocolatey goodness to bring a smile to anyone's face!

Technorati Tags:, , , , ,
Generated By Technorati Tag Generator

Friday, August 25, 2006

The eccentric chick who happens to bake also happens to pickle things from time to time...


Dilly Beans being one of them. This is another food thing that I got from my mother. I remember her making pickles and dilly beans towards the end of summer when little pickling cucumbers, beautiful crisp green beans and heads upon heads of dill were available at the farmer's market. Unfortunately with this batch I had to use dried dill weed, as heads of dill were not available at the farmer's market and even fresh dill was non-existent at the grocery.

I just love the concept behind canning or pickling foods. Preserving summer's bounty to enjoy during the winter months when these foods were once not available. We don't have to worry much now about doing this, as we have our cardboard flavored tomatoes and other such produce offered to us year round at our grocery stores.

The recipe for the dilly beans is simple, as most good things should be.

Dilly Beans
2# green beans
4 heads dill
4 cloves garlic

Boil together:
1 t. cayenne
2 1/2 c vinegar
2 1/2 c water
1/4c canning salt

Sterilize 4 pint jars in hot water (along with the lids and rings).Pack beans in hot pint jars with dill and garlic. Pour boiling liquid over. Process 10 minutes in a boiling water bath. If the jars don't seal after having sat out on a wooden cutting board or a towel for a few hours...just refrigerate them and eat as soon as you can.

The first photo is of the beans packed and ready to process on the right, and the beans after being processed on the left. It is a shame the colors fade with processing..but it must be done :).

This is a good project for weekends..Share the cleaning of the beans..sit outside and clean them down to size. Have one person pack the beans into the jars tightly while the other mans the liquid and processing. And then after they have sat in your pantry for a few weeks, crack a jar open and enjoy your own home made pickles. Yum.

Oh, P.S. I promise to be back to baking blogging next post...I have some lovely cupcakes I've made to share with you!

Thursday, August 24, 2006

Chocolate chip date cake


As a nod to my mental issues....I am posting a recipe while dealing with insomnia. Great...just great. I can't sleep, so I might as well try to be productive. The chocolate chip date cake is an absolute favorite of mine. It is my grandmother's recipe, she passed it on to my mother and my mother passed it on to me. It embodies one of my favorite things about baking (besides the fact that baking involves playing with dough) and that is the generational thing. Passing down recipes...memories associated with them. I cannot make this cake and not think of my wonderful, cranky, spunky, awesome grandmother (whom I still miss daily). I also cannot make this without thinking of my mom who is probably reading this and wondering how she raised such a strange baking freak. The passing down of recipes is a wonderful way to share a little bit of family history. Share a recipe with a family member today! It's a wonderful way to start a tradition.

On to the recipe:

Date Nut Chocolate Chip Cake:

1 ½ cup AP flour
¾ cup butter
1 tsp vanilla
1 tsp baking soda
2 eggs, beaten
¼ tsp salt
1 cup sugar
1 ¼ cup pitted and chopped dates
3 Tbsp Cocoa powder
1 ¼ cups boiling water
______________________________________________
- put dates, cocoa and baking soda in a small bowl, pour boiling water over and set aside.
-cream sugar, butter add salt. Add beaten eggs, mix to combine. Add date mixture, beat.
- Add flour and vanilla, pour into a greased 9x13x2” pan.
-Sprinkle the top with:
½ cup sugar
½ cup chocolate chips
½ cup nuts ( I prefer pecans)
- Bake at 350 f 30-40 minutes, or until done.

This makes a lovely, reddish cocoa cake, moist with dates. If the dates are cut small enough, you will never know they are there. I love the dates..so I tend to cut mine a bit chunkier.

Enjoy!

Technorati Tags:, , , , , ,
Generated By Technorati Tag Generator

Wednesday, August 23, 2006

Bunnies! or...Straying from food just this once..


Yes yes, this is a blog about food, sweets, baking, yummy things, but I couldn't resist posting a picture of the awesome new slippers that just arrived in the mail! They are very cute, and extremely comfy! I found them at: www.runawayrabbit.com shipping was prompt and, as I already stated, these bunnies rock!

I will be posting my recipe for chocolate chip date cake tomorrow..so tune in. Back to pampering my tootsies.

Tuesday, August 22, 2006

Three Ginger Cupcakes


I found this recipe in Baking in America by Greg Patent. They are actually quite light and very gingery...which is what i had hoped for, as I love ginger. I have written the instructions a bit shorter than they appeared in the book, as I tend to try to simplify things. Also, I upped the amount of crystallized ginger because you can never have too much ginger!

Triple Ginger cupcakes

1 ¾ cups sifted cake flour
½ teaspoon baking soda
¼ teaspoon salt
1 teaspoon ground ginger
½ teaspoon allspice
4 ounces butter, r.t.
1 teaspoon pure vanilla
3 Tablespoons grated ginger root
Zest of one orange, minced
1 cup firmly packed brown sugar
1 egg
¾ cup buttermilk
½ cup chopped crystallized ginger

Frosting
3 Tablespoons Heavy Cream
3.5 ounces white chocolate chopped
2 Tablespoons sour cream
________________________________________________
-heat oven to 350, prepare muffin tins for 14
-sift flour, baking soda, salt and spices together
-Beat the butter with an electric mixer on med until smooth, add vanilla, fresh ginger, orange zest, and ¼ cup brown sugar. Beat for 1 minute, beat in remaining brown sugar, ¼ cup at a time, beating for about 20 seconds after each. Scrape and beat on med/high for about 4 minutes. Add the egg and beat one minute.
- on low, add the flour in three alternating with the buttermilk. Beginning and ending with the flour and only beating till it’s just incorporated. Stir in crystallized ginger, fill muffin tins 2/3 full.
-bake for 25 minutes or so.
-,make the frosting….heat cream, add chocolate, whisk till smooth. Whisk in sour cream….frost cool cupcakes. Mmmmmmmm.

Introduction, of sorts...


This being my first post, I figured I should introduce myself a bit. My name is Jen and I am a baker. I relocated to northern California with my fiance, I shall call him G for now, about five months ago. I started looking for work about a month ago, had a few bites, but they were not successful yet..so I suppose I am an out of work baker who is becoming increasingly restless.

That said, I do plan on using this blog as a way to record things I am baking and cooking..and perhaps a way to keep a bit of my sanity (oh wait, no sanity, I've gone barmy!) intact and a way to practice two things that I love: making food and photographing it.

Now I must go figure out how to post pictures....