translate me!


Tuesday, September 26, 2006

The Many Faces of Brioche


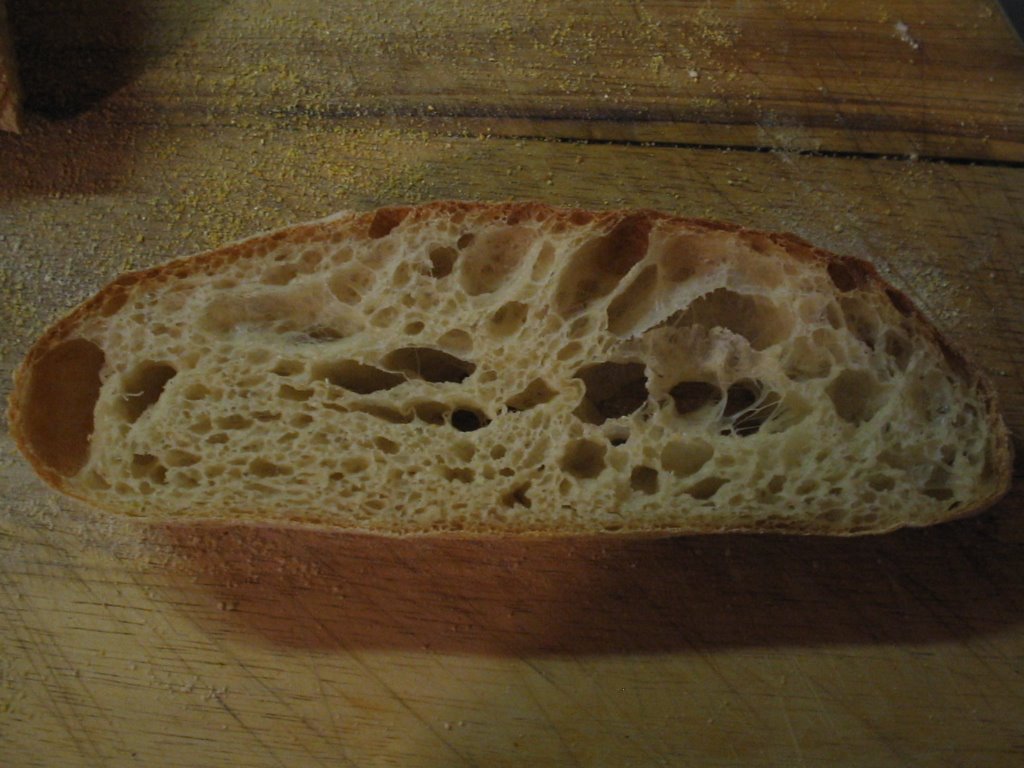
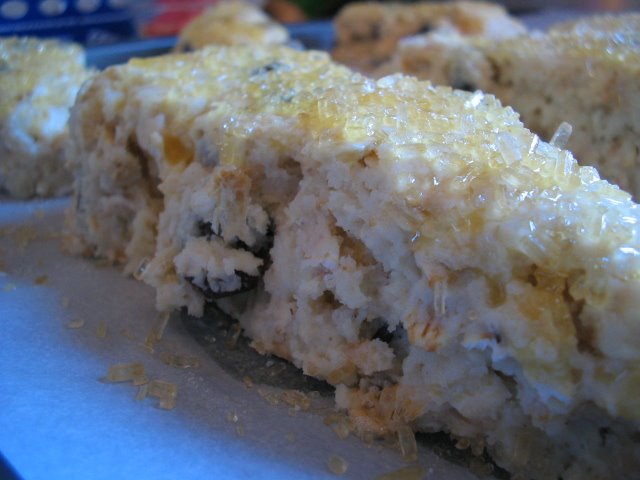
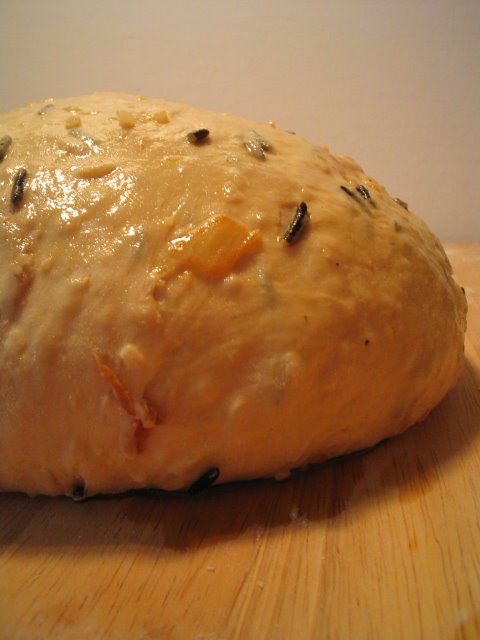
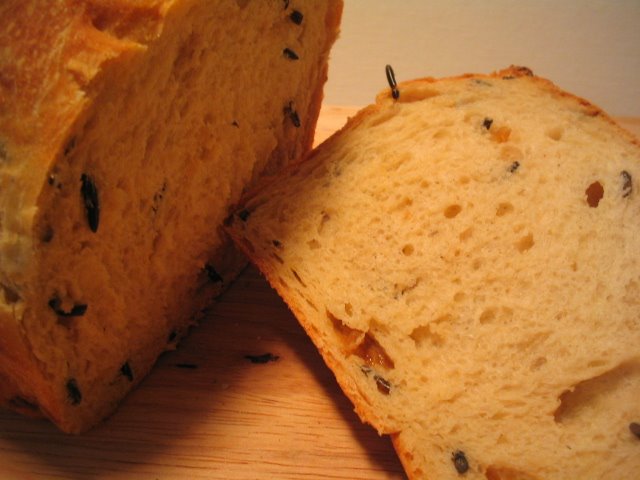
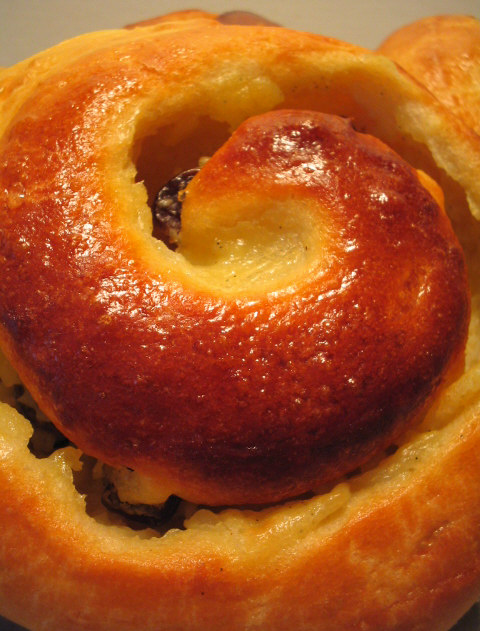
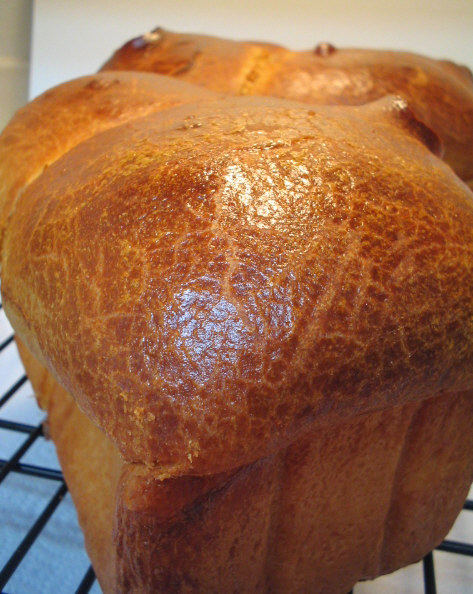
Brioche dough is very versatile. Yes, you can make bread out of it. Yes, I made bread out of it. I also made some rum raisin and pastry cream snails out of it. Mmmmmmm. You could use the dough for sticky buns, cinnamon rolls, dinner rolls, doughnuts or other sweets. This dough also lends itself well to savory fillings, spinach and feta filled brioche is quite delicious. Going for complete full fat and adding different kinds of shredded cheese near the end of kneading makes for a lovely flavor change (smoked cheeses are especially good). The finished bread is good for, well, eating. The bread also makes wonderful bread pudding and lovely french toast. Anyway you slice it(bad pun intended....sorry) brioche is fabulous stuff!

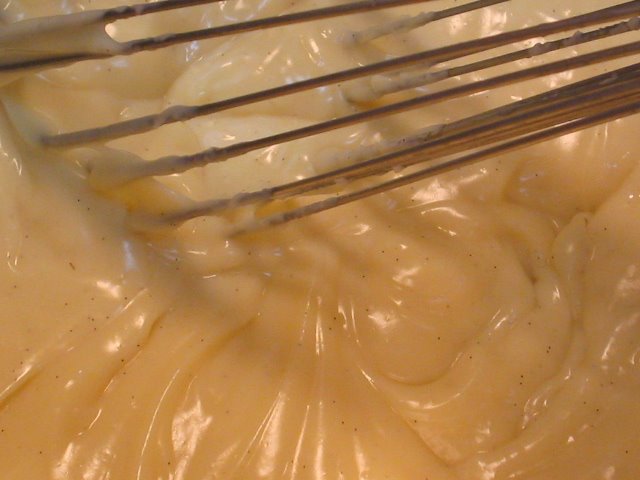
The pastry cream recipe is the quarter sized version from Bo Friberg's The Professional Pastry Chef.

Pastry Cream:

2 cups milk
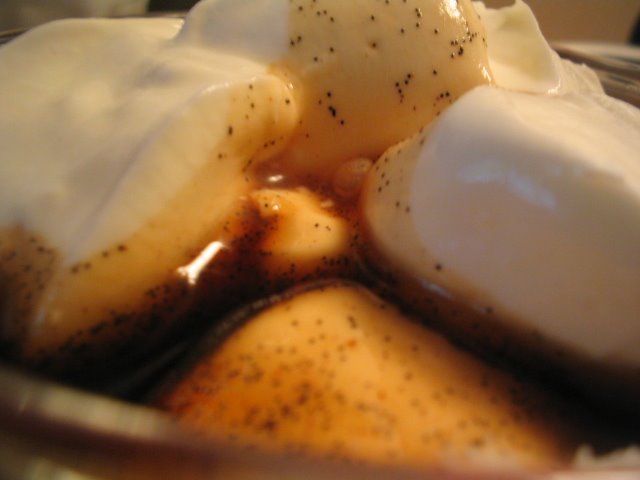
1/2 (or more if you like)tsp vanilla extract, or 1 vanilla bean or 1 tsp vanilla bean paste (I used the paste, because I love it and I had it on hand)*
1/2 cup sugar
1/4 cup cornstarch
Pinch of salt
2 eggs
*you could also use different flavoring such as grand marnier, rum, espresso powder, whatever suits your taste*
__________________________________________
-Place milk and vanilla in a heavy bottomed saucepan and bring to a boil.
-While the milk is coming to a boil, mix together the sugar, cornstarch and salt. Slowly add the eggs to the cornstarch mixture.
-Once the milk has come to a boil, slowly whisk a cup of hot milk into the egg/sugar mixture to temper the eggs. Whisk the tempered egg mixture into the remaining milk and bring to a boil, stirring constantly. The mixture will thicken. Allow to bubble for about a minute or 2 to cook off the starchy taste.
-Scrape the pastry cream into a shallow bowl or onto a sheet pan. Press plastic wrap directly onto the surface to prevent a skin from forming.
-Chill until needed. (this will keep for up to 4 days, but it is not recommended to make it that far in advance)
__________________________________________

I soaked about a cup of raisins in about 1/2 cup of rum overnight.
__________________________________________

Brioche Dough: (this recipe does not use a sponge as many others do)

1 pound 1 3/4 ounces high gluten or bread flour
3/4 ounce active dry yeast
1 3/4 ounces sugar
1/2 ounce salt
2 ounces milk
6 eggs
10 3/4 ounces butter
__________________________________________
-Place the milk, eggs and yeast in the bowl of a mixer with a dough hook attachment. Mix to blend and let sit for about 5 minutes.
-Add everything BUT the butter and mix on medium speed until the dough pulls away from the sides of the bowl, about 10 minutes.
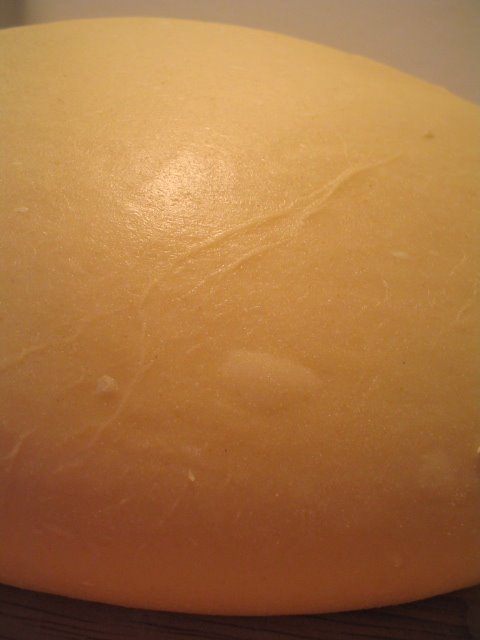
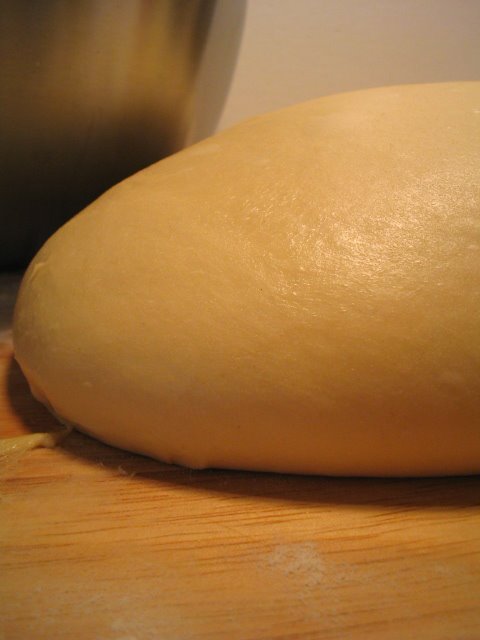
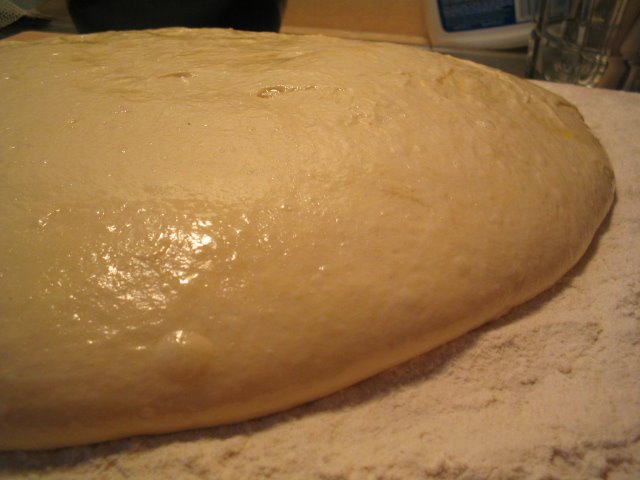
-Add the butter a few pats at a time, waiting until one batch is incorporated before adding more butter. Mix until all the butter is in the dough and the dough is silky and smooth and soft.
-Turn the dough out onto a buttered sheetpan, cover tightly with plastic wrap, and chill overnight (this allows the dough to ferment slowly and become much easier to handle.
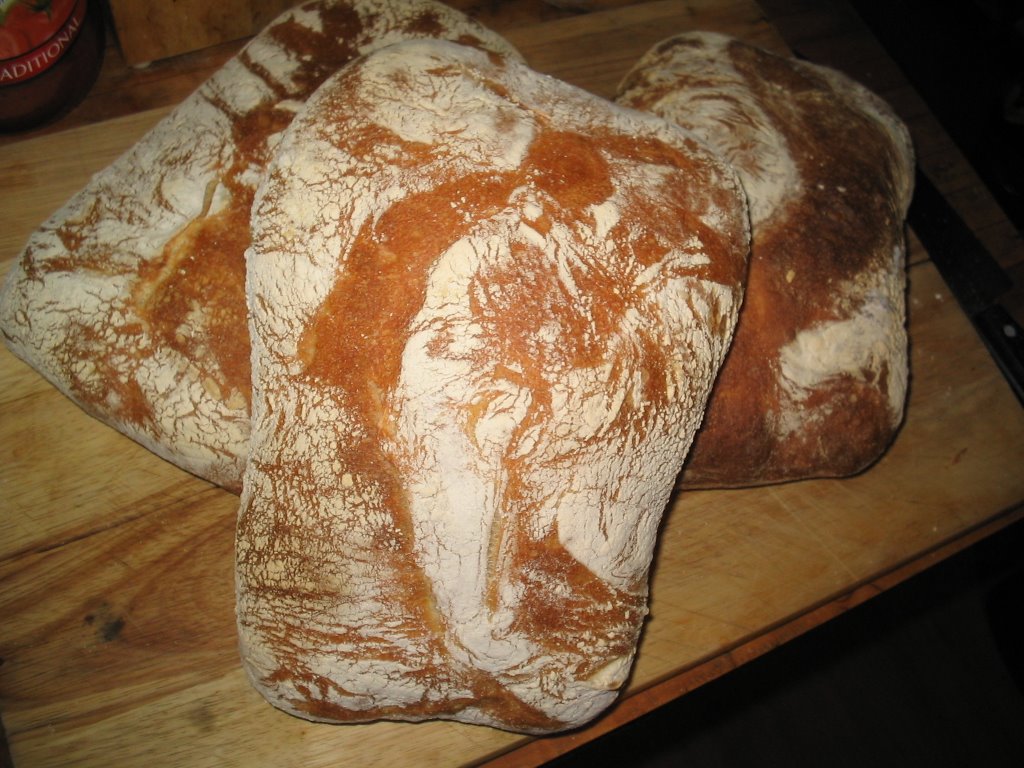
For Loaves:

-Preheat oven to 350f
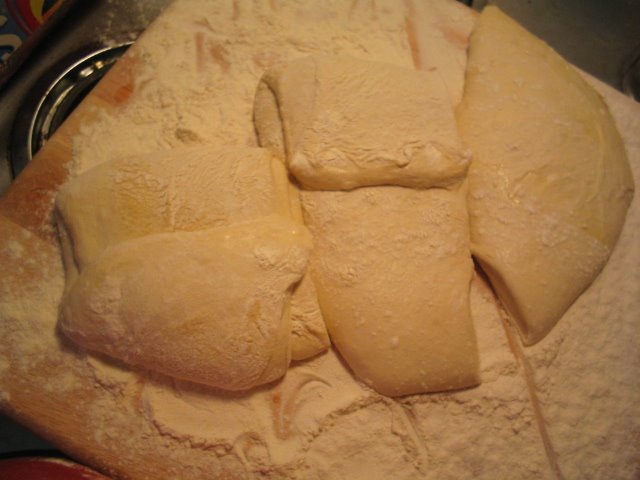
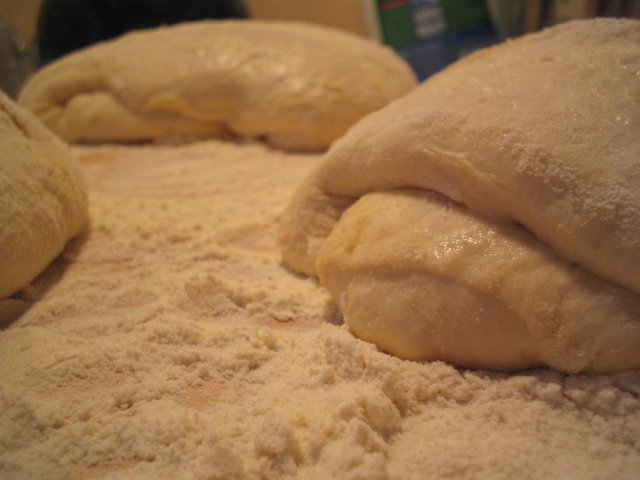
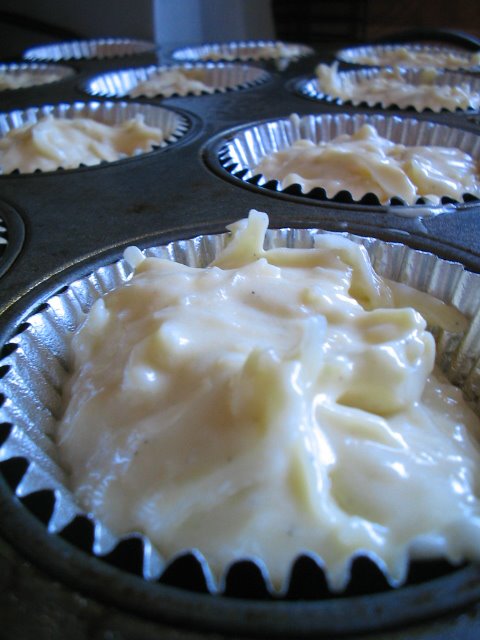
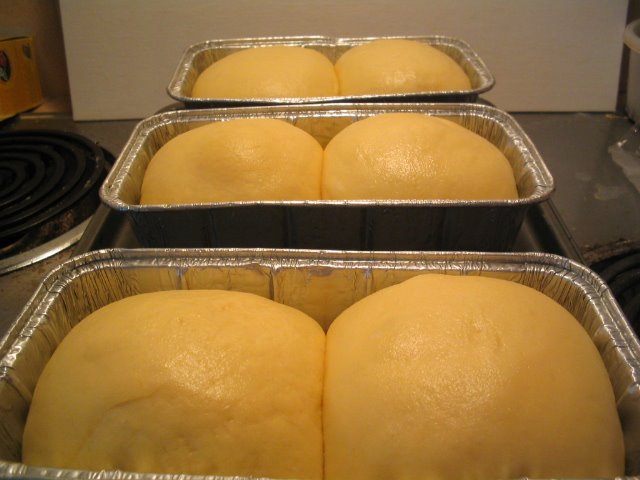
-The next day, remove the dough from the refrigerator and divide it into 8 ounce sections, shape each one into a ball. Place 2 balls per pan (I used 3x8" aluminum pans) cover with plastic wrap and let proof for an hour and a half or until the dough has just about doubled in size.
-Remove the plastic wrap and gently brush the loaves with an eggwash made of one egg and 1 Tbsp milk beaten together.
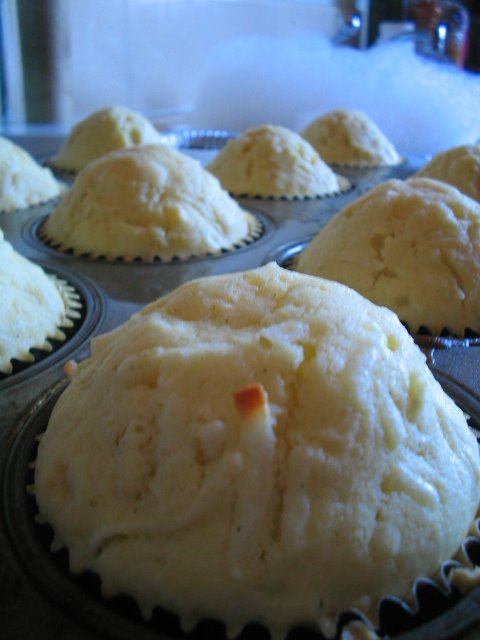
-Bake for about 30 to 40 minutes or until the loaves are a deep golden brown (may take more or less time depending on your oven)
-Cool and enjoy :D

The snails are based somewhat loosely on a snail I learned years ago when I had the priviledge to take a three day course at the French Pastry School in Chicago. The course was with Pierre Zimmerman covering fabulous breakfast doughs and pastries. I believe we used a pate levee, which is similar to the brioche dough.
For Rum Raisin Pastry Cream Snails (I need to figure out a better name for these things):

-Preheat oven to 350f
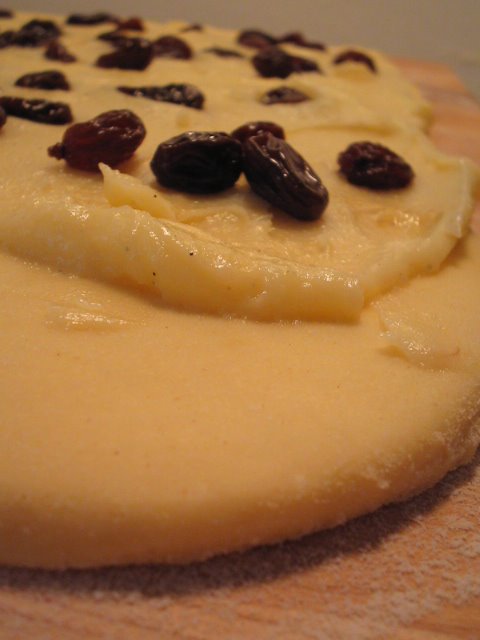
-Roll the brioche dough out into a rectangle about 1/2 inch thick and spread with the pastry cream leaving a one inch border on one side to seal the roll with.
-Sprinkle raisins over the top of the pastry cream and press in gently.
-Roll up the dough as if for cinnamon rolls sealing the bottom by pinching it shut.
-Cut the roll into 1 1/2 inch thick rolls and place on a greased cookie sheet about 3 inches apart.
-Cover with plastic and proof for about an hour.
-Uncover, brush with eggwash and bake for about 20 minutes, or until a nice deep golden brown.
-Cool on sheet pan for about 10 minutes, then transfer to a cooling rack (the pastry cream has a tendancy to sink shortly after coming out of the oven...don't worry, they still taste great)
-Enjoy!

Technorati Tags:, , , ,
Generated By Technorati Tag Generator

Monday, September 25, 2006

Luxurious, Beautiful, Buttery,


Silky, soft, elastic, smooth, luminous brioche dough. There is nothing that quite compares to the feel of it. It is like buttah, because, it is buttah. I will post the recipe tomorrow...today I just went a bit nutty with the pictures of the dough. I couldn't help myself, it really is lovely. The dough is comfortably nestled in my refrigerator firming and fermenting preparing itself for the transformation that all of us bakers love to witness. From dough to bread...it is a wonderful thing to behold! Recipe and directions will be posted tomorrow after all is baked! Be ready!

Saturday, September 23, 2006

Perhaps

Brioche. I've been banging a few things around in my head as to what I want to bake next. I feel as if I've been in a bit of a baking slump this past week. The muffins were the last thing I have baked, and that was about a week ago. This is not like me, well, that is to say this is not like me when I'm feeling all chipper and not mentally irregular. I'm guessing the doldrums have got me and I have yet to break free. I will fight them tonight and tomorrow. Fight them with the only weapons I possess! Ok, I admit, a mixer, some baking utensils and a big bunch of baking and cooking books aren't usually considered weapons but I will turn them into such. I have to. If I am unable to break free of the doldrums, they will drag me deeper down into their more powerful cousin, depression. So, I shall put on my armor (in my case, a few sheet pans) pick up my weapons (picture a whisk, a 10" chef's knife, measuring cups and my scale) and I will bake away the doldrums. I shall make some kick-ass baked product to share with others and feel powerful again! MMMmmmmmuuuuahahahahahahahahahhhaaaa! I shall triumph...and if I don't triumph, I will at least have some nice brioche and a few other baked goods to enjoy. :) Baking will commence tomorrow, really it will.

For now, I leave you with some pictures of one of my illnesses. My baking/cooking book case, a few different angles. I really do have a problem :) I will need to add a second case soon. Bear in mind, I left a box or two or three at home when I moved out here! Look for Brioche and a few other things in a day or two!


Saturday, September 16, 2006

Fall Beckons, or, I Succumb to Pumpkin


I'm starting to feel Autumn creeping up on me. Autumn is one of my favorite seasons. Having moved this year from Wisconsin, where the seasons announce themselves with gusto, to Northern California, I am afraid that I will be missing the seasonal changes. It is a bit cooler here now, the days are getting shorter but I am not sure if the leaves are going to turn the warm palette of colors that they do back home. I know I will miss the musty smell of the leaves on the ground just after a cool rain hits them.

I am going to try to make up for this with other things I like this time of year. And there's nothing I like better in the Fall than pumpkin things. The colors of the pumpkin remind me of the colors of the leaves. Jack o' lanterns are great fun to carve. Pumpkin incorporated into baked items is a joy to eat. You will start to notice a few posts involving pumpkin from here on out.

I woke up Sunday with a craving for some pumpkin muffins. These are a favorite of mine year round, but I haven't made them in a few years and decided I really needed to start making them again. These are wonderful muffins. Moist with pumpkin, spicy with cinnamon, nutmeg and ginger (or pumpkin pie spice if you have it on hand, I did not, so I had to make due with what I had). The best thing about them is that you can refrigerate the batter and it will last a few days. You can have fresh baked muffins everyday!


Pumpkin Muffins: Makes about 20 muffins.

15 ounces pumpkin puree (should be one small can of pumpkin, or if you prefer to use your own pumpkin puree, I think that would be grand)
2 1/4 cup sugar
1 1/2 tsp baking soda
1 1/4 tsp salt
2 tsp pumpkin pie spice ( I didn't have pumpkin pie spice on hand, so I used 1 1/2 tsp cinnamon, 1/2 tsp ground ginger and I grated a bit of nutmeg into it)
4 eggs
3/4 cup oil
3 cups all purpose flour
2 tsp baking powder
1 cup coarsely chopped walnuts or pecans
cinnamon sugar blend to sprinkle over the tops
_______________________________________________________
-Preheat oven to 350f
-Mix together pumpkin puree, sugar, baking soda, salt and pumpkin pie spice.
-Add eggs one at a time mixing after each addition until blended.
-Slowly add oil while mixing to incorporate.
-Sift together flour and baking powder. Add to pumpkin mixture and mix just to blend. Add nuts, and mix just to distribute.
-At this point you can keep the batter refrigerated in an air tight container for up to 3 days.
-Prepare a muffin tin by spraying with pan spray, or lining with paper muffin cups. Scoop batter into cups filling about 3/4 full. Sprinkle the tops of the batter with cinnamon sugar mixture.
-Bake at 350f for about 20-25 minutes or until the top of the muffin springs back when you gently push on it.
Mmmmmmmmm enjoy! Great for breakfast, great for tea, great for anytime!

Technorati Tags:, , , , , , ,
Generated By Technorati Tag Generator

Mixer Workout: Ciabatta at last!


As I type, the ciabatta dough is fermenting on the counter in the kitchen. It is becoming full of gas and slowly swelling. Full of yeasty life until I take over and pop it into the oven for it's final rise. Sometimes baking is a bit morbid.

Ciabatta: final dough

Biga - you want to take the biga out of the fridge about an hour before you use it,
so it can come to room temp, and cut it into about 8 pieces.
2 1/2 Tbsp milk
2 tsp olive oil
1 1/4 cup water
2 1/4 tsp yeast
2 3/4 cup high gluten flour (or bread flour with 3 Tbsp wheat gluten subbed for 3 Tbsp flour)
2 1/2 tsp salt
_________________________________________________________

-Place the cut up biga, milk, olive oil, water and yeast into bowl of mixer fitted with a paddle attachment. Mix on low speed (be careful, sometimes it tries to push some fluid out of the bowl...if you have a bowl guard, use it) just to lightly combine the biga and fluids and to get the yeast dissolved.
-With the mixer turned off, add the flour and salt. Mix on low speed to combine, then switch to medium/high speed.

-Beat the dough for about 8 minutes or until the dough is shiny and glutenous and cleans the sides of the bowl...it may take a little longer, but this won't take as long as the biga takes to develop the gluten.
-Transfer the dough to an oiled bowl (olive oil) and turn it in the oil to coat. Cover and let it ferment for about an hour and a half or until doubled...beware...it's sticky!
-Once the dough is doubled, heavily flour a cutting board (don't be shy, go crazy....you want a good amount of flour, or you will have problems with sticking later).


-Turn the dough out onto the cutting board, lightly flour the top, and divide into 3 pieces.
Gently fold each into thirds with the last crease ending up in the middle. Place the dough, crease side down, on the floured cutting board, cover with plastic and let rest for about 25 minutes.
-Prepare a baker's peel (I find that my wooden cutting board works perfectly as a peel as it fits nicely into the oven) if you are going to bake on a stone, or prepare two sheet pans by sprinkling them with coarse corn meal (this keeps the bread from sticking).
-Gently turn over the dough, and stretch it out to form the loaves. They should be about a foot in length and should sort of resemble slippers. Don't put them on your feet, lay them on the peel or on the sheet pans, cover them with plastic and proof for about 45 minutes or until just about doubled. At this point you should preheat your oven to 450 f. If you are going to rig steam in your oven, now would also be the time to put the pan in the bottom and get a kettle going with some water.

-Once the loaves have proofed, either slide them from the peel onto the stone or place the sheet pans in the oven. Pour your boiling water in the pan in the stove, if you are steaming, do this very carefully..steam burns are not fun! and shut the door.
-After about 10 minutes at 450f, turn the oven down to 400 and bake another 15 minutes. You may have to turn the loaves around to ensure even browning.

-Once the 15 minutes is up, check the loaves...they should feel light for their size, should seem hollow, and should have a nice deep golden brown color. If you feel they need more time, bake them in about 5 minute increments checking after each time.
-Cool the bread.
-Slice and dip in tons of olive oil...make a sandwich, toast it, it's really really delicious!

Technorati Tags:, , , ,
Generated By Technorati Tag Generator

Thursday, September 14, 2006

Come on! It's time! Break out those Mixers! And one...


And two..and one...and two. It's time for a mixer workout! No, no, I don't mean doing aerobics with a mixed drink in your hand. I mean it's time to make some ciabatta! Ciabatta is also known as "slipper bread" due to the shape it takes on after being baked. Somewhat like a nice puffy bread slipper to place on your feet, instead of placing it on your feet, I really recommend eating it dipped in some olive oil.
Like many good breads, this starts out with a preferment (another biga, in this case). Now this is a different biga than the one I used for the potato rosemary bread. This is a slack biga, a wet biga, a stretchy and fun to play with biga. Now, I'm sure you could mix this by hand, and if you were Popeye it wouldn't take too long or make you feel like your arm was about to fall out of it's socket, I really recommend a mixer.

This will be part one of a two recipe installment:

Small Mixer Ciabatta: The Biga:

1 7/8 cups water
1 3/4 tsp. active dry yeast
2 1/4 cups high gluten flour (bread flour will work if you cannot find high gluten, but if you use bread flour, I really recommend adding about 2 to 3 Tbsp of wheat gluten to it)
__________________________________________
-In the bowl of a mixer fitted with a paddle, dissolve the yeast in the water.
-Add the flour.
-Beat on low until flour and water are incorporated. Switch mixer to high speed, and let it mix until the dough cleans the sides of the bowl (you will be able to see the bottom of the bowl at this time, and the dough will form a wet lump in the center of the bowl). The dough should be shiny and glutenous and wonderfully stretchy.

-Oil your hands (this is very sticky stuff) and lightly oil a bowl (olive oil would be preferred) And carefully transfer the dough to the oiled bowl forming it into a ball (as best as you can). Make sure the dough has a light coat of olive oil on top. Cover with plastic wrap and chill over night or up to two nights (the flavor development will be a bit nicer if you let this chill for two nights).

Now let your mixers cool down and relax. Get them ready and willing for another workout tomorrow! Till then, thanks for tuning in!

Technorati Tags:, , , ,
Generated By Technorati Tag Generator

Tuesday, September 12, 2006

The King of Comfort Desserts


Or is it the Queen? Well, whichever one you prefer, I believe that peach cobbler ranks right up there at the top. Although I do believe that it would have to share it's kingdom with a few other desserts, perhaps bread pudding or apple crisp would reign side-by-side with cobbler. What is it about peach cobbler that makes me go all drooly around the mouth?
It's the combination of sunshine-y peaches and gooey and crunchy biscuit topping. My favorite part is where the biscuit touches the peaches as it bakes rendering a sort of biscuit sponge filled with peach juices. Yum.

This particular recipe is from the book Classic Home Desserts by Richard Sax. I love this book, this book is starting to fall apart at the binding. I have made a few adjustments in some of the amounts, and the original recipe calls for raspberries to be added as well. I just wanted pure peach enjoyment, so I omitted them.

Peach Cobbler with Pecan Topping:

filling:
8 large ripe peaches
juice of one lemon
1/2 cup sugar
4 Tbsp cornstarch
1 tsp ground cinnamon
Pinch of fresh grated nutmeg
Pinch of salt

-peel and slice peaches
-toss to coat with lemon juice
-mix together sugar, cornstarch, cinnamon, salt and nutmeg, add to peaches, mix to coat, place in an 8x8" pan or a casserole dish and set aside.

Preheat oven to 375f.

Biscuit:
1 1/3 cup all purpose flour
1/4 cup sugar
1 1/4 tsp baking powder
1 tsp baking soda
1/4 tsp salt
1/4 cup cold unsalted butter, cut into pieces
1/2 cup buttermilk
-You can mix the dough by hand cutting in the butter then mixing in the buttermilk. I used the food processor:
-pulse the dry ingredients together to blend.
-add the butter pieces and pulse until the mixture is crumbly
-pour most, but not all of the buttermilk over the flour mixture, pulse until it comes together, use all the buttermilk if necessary.
-dab bits of this dough over the top of the cobbler, and brush with a little milk.

Pecan Topping:
1/2 cup coarsely chopped pecans (or almonds...or other nut)
3 Tbsp brown sugar
1 tsp ground cinnamon
-mix together in a bowl and sprinkle on top of the biscuit
-place a sheet of foil underneath the cobbler in the oven to catch drips and bake for about 45 minutes or until the peach juice is bubbling up.
If you fear the top getting too dark, cover with a piece of foil about half hour into baking.
-cool until warm, and serve alone or with ice cream or whipped cream or....yum.

Happy peachy sunshine baking!

Technorati Tags:, , , , ,
Generated By Technorati Tag Generator

Peaches


Cobbler to follow......

Sunday, September 10, 2006

"Slowly I have gained the trust of the Baker....


she has left me alone with the scones". A friend of mine flew out to Connecticut with me a few years ago to witness my Mom's Installation Service (Barmy's mum is also known as Revmum). I was quite the control freak about baking (really, I still am today). We were baking some treats for a few of the church members before the service, I had to go get ready for the installation, so I left Beck alone to watch the scones in the oven for a bit. She came up with that little quote, and stories have been told since.

There is nothing much better than scones fresh from the oven, broken open and slathered with your favorite jam or some butter. I woke up this morning wanting just that. Scones are really a form of biscuit (that would be American biscuit,not the UK biscuit which is a cookie here) or at least the mixing method for scones is about the same as the method for mixing up biscuits. Despite having oats and raisins in them, these scones are very light, not dense like one might expect. The really wonderful thing about these is that you can make the dough ahead of time, and cut and freeze it, pull it from the freezer and thaw overnight in the fridge and bake them off in the morning. Very convenient.

Oat Raisin Scones:

12 1/2 ounces all-purpose flour
1/2 ounce baking powder
1/4 ounce baking soda
1/4 ounce salt
4 1/2 ounces sugar
9 ounces unsalted butter, chilled
7 1/4 ounces old fashioned oats (I haven't tried these with instant oats, so I cannot say how they would work with them)
6 ounces raisins (or you could use any other dried fruit that you like. I also like to use chopped dried apricots in these)
6 ounces buttermilk
____________________________________
-Preheat oven to 400f
-Mix flour, baking powder, baking soda, salt and sugar together in a bowl.
-Cut butter into flour mixture with your hands, or a pastry cutter or a fork or whatever has worked for you before, until the flour is somewhat mixed in, but a few medium chunks are still present.
-Add oats and mix just to distribute them. Add raisins and buttermilk and mix just until the dough comes together (sometimes a little extra buttermilk is needed, usually it's not).
-Turn the dough out onto a floured surface and flatten and fold over once. Flatten again into a rectangle about 1 1/2 inches thick.
-Cut the dough into triangles (or circles, or whatever shape you would like, I like triangles because I won't have to reshape the dough and possibly overwork it). At this point you can layer the scones between sheets of parchement and wrap in plastic or place in a baggie and freeze them.
-Place the triangles on a sheetpan lined with parchement paper. Beat one egg with about a teaspoon of water or milk to make an eggwash.
Brush the tops of the scones with eggwash and sprinkle the tops with turbinado sugar (or whichever kind of sugar you have handy). I am wishing for some pearl sugar, but have not gotten around to purchasing any at this time.
-Bake the scones for about 12 minutes, or until they are puffed up and a nice golden brown on top.
-Serve warm with butter and jam..or cool and eat....whichever you like! Tea is really nice with these also. We had these with some of the pluot jam I made earlier this year. Yum.

Friday, September 08, 2006

Coconut Cupcakes with Chocolate Icing


I am a big fan of coconut cake with boiled icing (which I do plan on making and posting in a few weeks or so) so when I came across these cupcakes in Baking in America by Greg Patent, I thought "why not give these a try". Coconut and chocolate are always a good combination. These cupcakes, like all the cupcakes I've been making, did find their way to G's office. They enjoyed them thoroughly. I admit that they were not my favorites, but since the people who seem more than happy to accept my experiments liked them, then I think they are post-worthy. I think I was hoping for more of a "Mounds Bar" or "Almond Joy" kind of flavor. Although they did grow on me after the first one (I only had one and a bite of one...but the bite after the first one I liked much better...hmmm). The recipe is from the book mentioned above, with the directions in my own words (as almost always seems to be my way). I think the icing was my favorite part.

Chocolate-Frosted Coconut Cupcakes

1 ½ cups sifted cake flour
1 tsp baking powder
¼ tsp salt
4 Tbsps butter, r.t.
½ cup sugar
1 tsp pure coconut extract
½ tsp vanilla
2 eggs
1 yolk
½ cup unsweetened coconut milk (or whole milk)
1 cup chopped sweetened or unsweetened shredded coconut
_______________________________________________________
-Heat oven to 350f, line 12 cup muffin tin (just a note: this recipe said it made a dozen cupcakes, I only ended up with 11. I may have over scooped the cupcakes, or perhaps my flour was very loose in the cup, just thought you should know).
-Sift together dry ingredients.
- Beat butter on medium until smooth, gradually beat in sugar, 2 Tbsp at a time, scrape, add coconut and vanilla extracts and beat on high for 3 to 4 minutes. Add 1 egg and the yolk and beat for 1 minute. Add the remaining egg and beat for 1 minute.
-on low speed, add the flour in three additions, alternating with the coconut milk, beginning and ending with the flour. Beat only until the flour is just incorporated. Stir in coconut (this was a very good tasting batter). Fill muffin tins 2/3 full.
-Bake for about 20 minutes. Cool.

Frosting:
1 ½ ounces unsweetened chocolate
1 Tbsp butter
3 Tbsp sour cream
1 tsp vanilla
Pinch of salt
1 ½ cups confectioner’s sugar
____________________________________________
-Melt chocolate and butter, whisk in the sour cream, vanilla and salt. Gradually whisk in the sugar, until the icing is smooth enough to spread, thin with milk or cream if needed (just a side note: this icing did look broken to me until I added the icing and whisked, it all came together as the icing was added to a tasty smooth topping)
Frost cooled cupcakes quickly…frosting sets up fast!

I garnished these with toasted coconut flakes, but you can use whatever you like. I think toasted blanched almond slivers would be excellent.

Enjoy your sugar high!

Thursday, September 07, 2006

Caramelized Onion Wild Rice Bread


Some of you may have noticed that I had some Biga left after making the Potato Rosemary Bread. What did I do with it? I seized the opportunity to play around with dough in the kitchen and came up with this lovely bread. I was very happy with the results. Chewy crust and fairly open crumb with little pockets of caramelized onion throughout and toothsome bits of wild and brown rice popping up here and there. It would be perfect for sandwiches of leftover turkey or grilled veggies. It also stands alone quite well.

This will make 3 9x5" loaf pans of bread. I did experiment with free form loaves, and they will work, but I found the loaf pan bread to be the most pleasing..... On with the recipe!

Caramelized Onion Wild Rice Bread:

11 ounces of Biga, cut into pieces and allowed to sit out covered at room temperature for about an hour.
1/4 cup buttermilk
1 cup water
2 cups cooked wild rice/brown rice blend (I just used a half and half mixture of wild rice to brown rice and cooked 1 cup of this mixture in 2 cups of water for about 45 minutes)
1 1/2 Tbsp. active dry yeast
5-6 cups unbleached bread flour or high gluten flour if you can find some.
1 1/2 Tbsp salt (I used sea salt..kosher or table salt would work fine I'm sure)
1/3 cup brown sugar
2 medium yellow or white onions julienned and caramelized in 2 Tbsp butter.
____________________________________________
-In a mixing bowl with a dough hook on low speed mix together the Biga, buttermilk, water, rice and yeast until a slightly blended together.
-Add the flour, salt and brown sugar, and mix on low until the dough just starts to come together.
-Add the caramelized onions, mix on low until they are incorporated, then switch the speed to medium (if mixing by hand...once the dough comes together in the bowl, turn it out onto a floured surface and knead for about 10 minutes) and mix for about 6 to 8 minutes or until the dough is very elastic and smooth (with the exception of the rice and onion bits). Add more flour during the kneading process if the dough is too slack.
-Shape the dough into a ball and let it ferment in an oiled bowl for about one hour (because of the sugar in this dough, it is a fast mover) or until doubled.


-Turn out onto a lightly floured surface and cut into three even sections. Shape the dough into logs that will fit the length of your 9x5" pans, spray the pans with pan spray and place the dough inside. Spray the tops of the loaves with pan spray and cover in plastic for about 45 minute to 1 hour or until just about doubled.
-Have oven preheating to 350f during the last half hour of the rise. You want a lower temperature for this bread because the sugars and onions will cause the crust to brown faster and darker.
-Bake at 350 for 30 to 40 minutes, or until the bread is done.
-Turn out of the pans and cool on a rack.
-Slice and enjoy! Yummy!