translate me!

 
Showing posts with label dessert. Show all posts

Monday, February 11, 2008

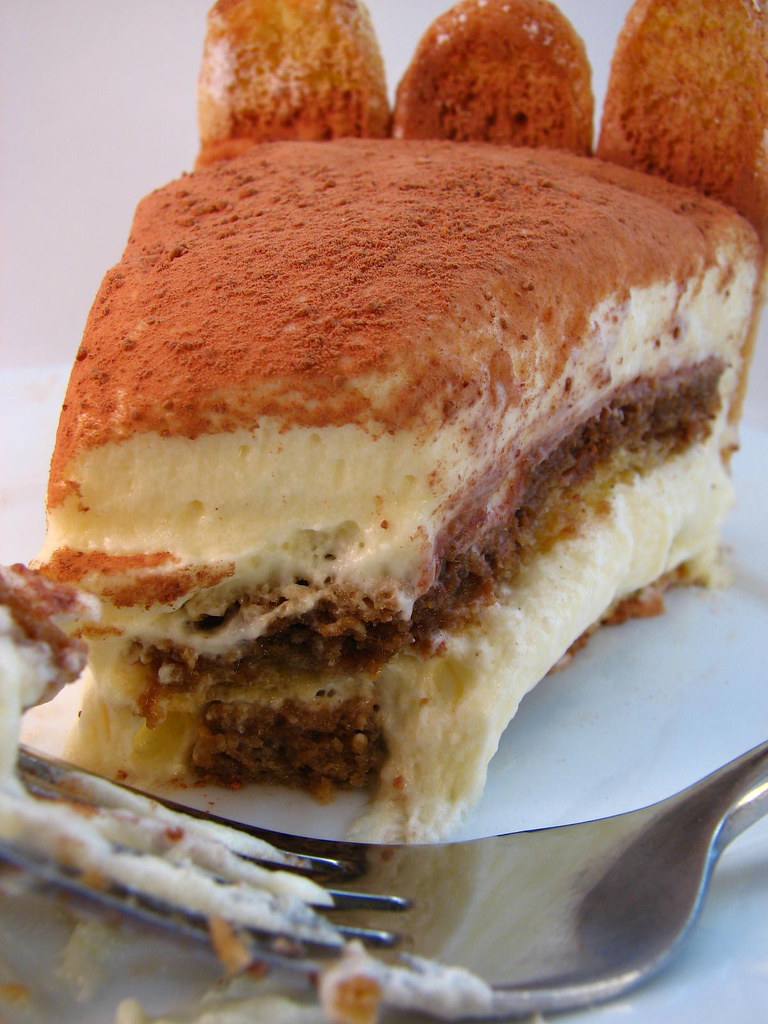
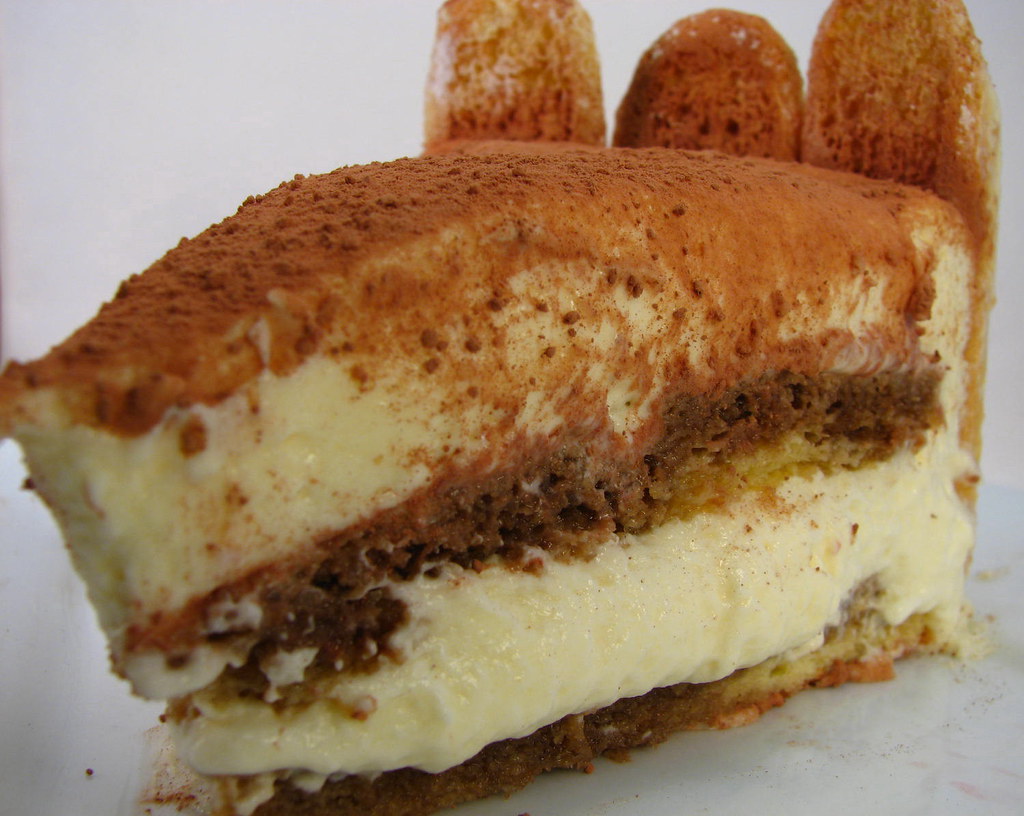
Nothing Says "Happy Valentine's Day" Like Tiramisu (Really, Nothing says "Happy Any Day" Like Tiramisu )

Yes G and I are one of those sappy couples that got engaged on Valentine's Day. I never was a fan of sap, but really, this kind of sap was quite all right for me. So, this year I wanted to be nice and sappy and make one of our favorite desserts, tiramisu. Tiramisu is yum. Tiramisu is comfort dessert. Tiramisu can be made with store-bought ladyfingers, but why use those, when you can make your own fresh ones at home with loads of egg whites, yolks, a piping bag and whipping utensils?

If you want more information about this wonderful dessert, you can check out this entry about Tiramisu at Wikipedia, they also have an informative entry about LadyFingers.

So, to begin your tiramisu, you will need to make (or buy) some ladyfingers (I chose to make them because well, I'm a bit nutty and I like the fresh ones). There is no shame in buying these already made:

Ladyfingers: (I decided to make more of a tiramisu cake then just plain ole tiramisu, so this will make 2 piped layers of lady fingers and then enough fingers to line the outside of the "cake")

8 egg whites
8 egg yolks
7 1/2 ounces granulated sugar, divided in two parts, one being 3 ounces and one being 4 1/2 ounces
6 ounces sifted cake flour (I confess to having no cake flour on hand, so I am using all-purpose, shhhh don't tell the lady finger gods)
________________________
-Preheat oven to 425F.
-Line a few sheet pans with parchment. If you are going to to make this like a cake you will want to pipe circles of the ladyfinger batter the size of your springform pan (or a little smaller actually) by tracing the pans onto the parchment and placing that parchment on the sheet pans marked side down (you don't want ink in your lady finger cake..well, you might, but I don't recommend it). Have a piping bag with a large plain tip ready to go.
-In the bowl of a mixer fitted with a whipping attachment (Or you can whisk by hand if you are strong of wrist, I whisked these by hand because, well, as I said earlier, I'm just plain nuts) place the egg yolks and 3 ounces of sugar. Whip on high until the mixture is thick and light lemon colored. This is called a "cold sabayon".-Place the egg whites in the bowl of a mixer with a whip attachment (I used my mixer for these, cause I'm not that crazy, my arm was unhappy with me after doing the sabayon..geesh, I'm out of practice). Begin whipping the whites until they start to become a little foamy and then start to slowly add the 4 1/2 ounces of sugar. Whip a bit between each addition. You want your whites to be a medium peak, like so:-Take 1/4 of the whipped egg whites and fold them into the yolk mixture to lighten it (this is called "sacrificing" always sounds neat to "sacrifice 1/4 of the whites"). Gently fold the remaining whites into the yolks until it is just about blended, then add the sifted flour and fold until it disappears into the batter.-Fill your piping bag with the mixture and pipe out the cake rounds (I'm doing 2 thin ones)


and then pipe out your fingers (you want them to be fairly even in length as they will be used to decorate the outside of the cake). Pipe the rounds so they are about 1 inch smaller than the diameter of your springform pan. You can just make all fingers if you want to go for a more traditional tiramisu layered in a square pan.
-Lightly sprinkle the tops of the ladyfingers with powdered sugar, and bake for about 5 to 10 minutes at 425f.
-Cool on a rack and if not using the same day, store in an airtight container with parchment paper between the layers.
*Please note, I had forgotten that my original recipe was more of a production recipe (I haven't made these in ages) so the amount of batter I have is insane. I have halved the recipe here for you, so don't worry if your batter appears to be a bit less than what I have. I have ladyfingers coming out of my ears.....I'll be freezing them. No wonder my arm hurt from whisking the yolks. Don't be surprised if you see them show up in the future*

Now that you have your dainty little ladyfingers, you can make the tiramisu soaking syrup and the wonderful loverly insides.

Soaking syrup for the Ladyfingers:

2 cups of coffee or espresso (I had espresso powder on hand, so I made 2 cups of it)
1/2 cup sugar
1/3 cup Rum (some people use marsala in the syrup, some people use rum, some people use other things....depends on how you are feeling or what you have on hand)
________________
-Mix these three together and if you feel the need to adjust sugar amounts or other amounts, do so. Bring to a boil and then reduce heat to a simmer and allow to simmer until the mixture is reduced by about 1/4. Place in a shallow container for dipping if you are using all finger shaped ladyfingers , or in something else if you are using ladyfinger rounds (really like a sponge cake) and will be brushing on the syrup.


And now for the mascarpone goodness...

Tiramisu Filling (I made a double batch of this because I was being very enthusiastic, the single batch listed here should be plenty)

3 large eggs, separated
3/4 cups sugar
1 container mascarpone cheese (16 ounces or about 2 cups)
1 cup heavy cream
2 Tbsp orange liqueur (you don't have to add liqueur to the filling, I just like the slight citrus touch it gives...you could also add marsala wine, or rum, or whatever you feel like adding..)
______________________
-Beat the yolks and 1/2 cup sugar by hand -or with your mixer and a whip attachment- until the yolks are thick and light in color (just like you did for the ladyfingers).
-Add the mascarpone to the yolk mixture and beat until just blended.
-Whip the heavy cream and liqueur (if you are adding booze) in a chilled bowl by hand or machine until it holds soft peaks.
-Whip the egg whites in your mixer with the whisk attachment until they are just foamy and then slowly add the remaining 1/4 cup of sugar while whipping on high speed. You want medium peaks again, as for the ladyfingers.
-Fold the heavy cream into the mascarpone and yolk mixture, sacrificing 1/4 of it first to lighten and then gently folding in the rest. Then fold the whites into this mixture.
*the filling does have raw eggs in it, so if this bothers you, there are other recipes you can find online that use no eggs*

Begin Assembly.

Springform mold: Take the first cake layer you piped and place it in the bottom of the spring form mold. Place a ring of ladyfingers around the edge of the pan. Brush the cake layer with the coffee syrup until it has had a fairly good soaking and spread 1/3 of the tiramisu filling over the top. Repeat this with the remaining layers ending with a layer of tiramisu filling.
Generously sift cocoa powder over the top, gently cover and chill for 6 hours or overnight to allow it to set up. Decorate with chocolate shavings or strawberries or however you would like. This is not really a firm set, so if you go this route, take care when you slice the "cake" as it will be soft, but not unmanageable. I skipped the berries and chocolate shavings for my presentation, however I think a few chocolate shavings would be really really nice. And maybe a raspberry or two as well.

Layers of ladyfingers: dip each ladyfinger into the coffee syrup and place in the bottom of a square pan. Cover the layer of fingers with half the mascarpone mixture, do one more layer of ladyfingers, one more layer of mascarpone. Sift cocoa powder over the top and allow to chill for 6 hours to overnight.

Enjoy!
Happy Baking, and Happy Valentine's Day everyone!
Technorati Tags:, , , , , , , ,
Generated By Technorati Tag Generator

Tuesday, August 07, 2007

Perfectly Pale Green Pistachio Pound Cake


I've been waiting for an excuse to make this wonderful cake. I've had some pistachios left over from a previous baking adventure and had decided that they would be perfect in a pound cake. I've made this particular cake before plain and have used pecans in it as well (I love it with pecans, yum) and decided that it was time to try it out with pistachios. I was hoping they would lend great taste as well as a nifty color to the pound cake. Traditionally pound cake recipes are just that, a pound of butter, a pound of eggs, a pound of flour and a pound of sugar. I've never tried that particular recipe, I think I shall someday soon. Anyway, my excuse to make this comes in the form of getting to meet some of my husband's friends this weekend. They will be joining us for some tea and conversation this Saturday and I will be making a few nice things for us to nosh on. This is one of them:

Pistachio Pound Cake: Makes one 9" cake round or two 7x3" bread pans or one bundt pan (method is important in the making of this pound cake, as there is no chemical leavener used. The creaming of the butter, and beating in of the eggs will help to give the cake rise)


8 ounces (one cup or two sticks) unsalted butter at room temperature
12 ounces sugar
optional: one drop of green food coloring (usually I hate to add food coloring to baked things, but I admit that I cheated and added a drop to this)
5 eggs at room temperature
6 ounces all-purpose flour, sifted with the pinch of salt
pinch of salt
1 cup finely ground pistachios (I toast the pistachios at 350f for about 10 minutes and then let them cool before grinding them)
1 Tbsp vanilla bean paste (or you can use the same amount of vanilla extract)
1 cup whole pistachios
_________________________
-Preheat the oven to 325f. Prepare your baking pan of choice with butter and flour.
-Cream together the butter and sugar (and the drop of food coloring if you are using it) until light and fluffy, about 10 minutes.
-Add the first four eggs, one at a time, mixing well between each addition, reserve the fifth egg. Add the vanilla and blend in.
- Add the flour and salt mixture and the ground pistachios and mix on low speed until the flour has just started to disappear.
-Add the fifth egg and mix to incorporate.
-Fold in the whole pistachios.
-Scrape the batter into the prepared pan and bake for about 1 hour, or until the cake is golden brown and springs back when pressed with a finger.
-Cool in pan for about 10 minutes, then invert and finish cooling on a rack. Serve alone or with whipped cream or a big scoop of vanilla ice cream. Enjoy!

This cake does freeze fairly well. Just wrap it up snug in some saran wrap and freeze it for no more than 2 weeks(you could freeze it longer,but the quality will diminish as it does for most baked goods that are frozen).

Technorati Tags:, , , , , ,
Generated By Technorati Tag Generator

Tuesday, July 10, 2007

Casual Cake?


Banana cake, is it just another way to use up old bananas or is it an excuse to buy a few extra bananas? I like to think it's a fabulous excuse to buy that bigger bunch of bananas. A good banana cake with some cream cheese icing hits the spot when a sweet snack attack occurs. This is great for a casual dessert when company drops by or just as a lovely addition to any picnic. It's a no frills dessert that banana lovers will gobble up. Sure you could dress it up with caramelized bananas or a Foster's sauce, but sometimes it's nice to have a simple cake with straightforward flavors. This is another one of my Gram's recipes that I've tweaked just a little bit and the recipe for the cream cheese icing can be found here (minus the coconut and nuts mentioned...well, I am not using them for this, but they certainly wouldn't be bad with this cake).

Gram's Banana Cake:

2/3 cup unsalted butter at room temperature
1 1/2 cups sugar
2 eggs
3 bananas, mashed
1/2 cup buttermilk
1/2 tsp baking soda
1 tsp baking powder
2 cups flour
1/4 tsp salt
1 tsp vanilla
__________________________
-Preheat oven to 350f. Prepare two 9" cake rounds with a parchment circle on the bottom and pan spray on the sides and bottom.
-Sift together the flour, baking soda, baking powder and salt, set aside.
-Stir the vanilla into the buttermilk, set aside.
-Cream together the butter and sugar. Add the eggs, one at a time, mixing to blend after each addition. Add the mashed bananas and mix to combine.
-Add the flour and buttermilk mixtures alternating between the two, starting with 1/3 flour, mix, add 1/2 of the buttermilk, mix, add another third of the flour, mix, add the remaining buttermilk, and follow with the last of the flour. Mix until the flour has just become blended in.
-Evenly distribute the batter into your prepared baking pans (I used a regular sized ice cream scoop to do this and got about 5 scoops per pan) and bake for 12 minutes, rotate the pans front to back and bake for another 10 to 12 minutes, or until the cakes are a nice golden brown and spring back when the top is touched lightly.
-Cool in the pans for about 5 minutes, then invert out of pans and allow to cool thoroughly on a rack.
-Prepare the cream cheese icing (you could use the recipe from the post listed above, or you could make your own, or even a simple icing of butter, confectioner's sugar and vanilla would work).
-Slice the layers lengthwise giving you four layers. Spread the frosting thinly between each layer, ending with a nice coating on top. You can also do the sides if you wish, I just really like the casual look without the sides coated in icing.
-Cut a big slice and enjoy with coffee, tea, milk, or whatever you like!

Happy Baking!


Technorati Tags:, , , , , , , , ,
Generated By Technorati Tag Generator

Thursday, June 28, 2007

Makin' Whoopie...


No, I haven't been watching reruns of "The Newlywed Game" (hopefully I haven't given any of you strange flashbacks to the show...we used to watch it when I was a young baker), I'm talking about Whoopie Pies. I have seen Whoopie Pies before and I always wanted to try them out. So, imagine how happy I was to find a recipe for them in Chocolate American Style by Lora Brody (a book I am just now beginning to appreciate). These little cakes look very promising with their deep dark chocolate rounds filled with billowy marshmallowy filling. These are just wonderful when you are having an attack of the sweet tooth. Easy to make and very very satisfying. The name is fun to say to boot, so really, you can't go wrong! These could also be perfect for a picnic as they last a while, are individually wrapped and are crowd pleasers.

Whoopie Pies (adapted from Chocolate American Style by Lora Brody) Makes 9 large pies, 18 smaller ones:

For the cakes:
2 cups all-purpose flour (5 ounces..I used the weight measurement instead of volume for this one)
3/4 cup unsweetened natural cocoa powder
1/2 tsp baking powder
1 tsp baking soda
3/4 tsp salt
1 cup whole milk (I used buttermilk instead of the whole milk and lemon juice cause I love the moisture buttermilk brings to the party)
1 Tbsp lemon juice
2 tsp vanilla extract (or a little more if you like, I used 3 tsp or 1Tbsp of it)
1 stick unsalted butter, at room temperature
1 cup dark brown sugar, packed
1 large egg
__________________________
-Heat oven to 350f. Prepare two sheet pans by lining them with parchment paper.
-Sift together the flour, cocoa powder, salt, baking powder and baking soda into a medium bowl, set aside.
-Mix the milk, lemon juice and vanilla together and set aside (the mixture will thicken and curdle while it sits).
-Cream together the brown sugar, butter and egg until light and fluffy. Turn the mixer down to low and begin to add the flour and milk mixtures alternately. Starting with 1/3 of the flour adding 1/2 of the milk, 1/3 of the flour, the rest of the milk and then the rest of the flour mixture. Mix until just blended.
-Measure the batter out with a 1/4 cup (if you want 9 large pies) or about 2 tbsp each for smaller pies. Drop this batter onto the prepared sheet pans leaving about 2 inches between the cakes. Tap the sheets gently on a counter before baking to remove a bit of the air.
-Bake the cakes for 12-15 minutes (shorter time is needed for the smaller cakes, I'd say 8 to 12 minutes) until they are firm to the touch. Remove from the oven and cool on the sheet pans.

Filling:

1 stick unsalted butter, room temperature
1/2 cup powdered sugar
2 cups marshmallow cream or fluff ( I tried this with marshmallow cream, but it did not work out for me. I ordered the fluff and it really did make a difference....maybe it was just to warm here that one day for cream..)
2 tsp vanilla extract (or vanilla bean paste if you have it on hand to add little beautiful vanilla specs to the filling)
___________________________________________
-Place everything but the vanilla in a mixing bowl. Using an electric mixer, beat everything until it is blended, then stir in the vanilla.
-Spread half the little cakes with this mixture, then top with the other half of the cakes.
The Whoopie Pies may be wrapped individually in plastic wrap and stored at room temperature for up to a week. I love to make these for road trips or picnics, they would be perfect for the Fourth of July. Next time anyone asks you where the best place to make whoopie is, you can smile and reply "in the kitchen, of course!".

Whooooooopie!
Happy Baking.


This post can also be seen at Just Baking.

Technorati Tags:, , , , , , , , ,
Generated By Technorati Tag Generator

Wednesday, June 27, 2007

Strawberry, Meet Rhubarb. Rhubarb, this is Strawberry.


I think that whomever it was that introduced these two should stand up and take a bow. What a beautiful working relationship they have. The sweet strawberries compliment and balance the tart astringent rhubarb. The two are just perfect for each other. While I do enjoy these baked together in a bubbling pie, my favorite way to have them is baked on top of a simple cake base. This is my Grandmother's Kuchen. It works well with any ripe fruit baked on top, but the strawberry and rhubarb remind me of summer days spent playing hide and seek in her backyard with my sisters. We'd go inside to cool off and sometimes we were lucky enough to have the kuchen as a snack, although more often it was served as a dessert. It's wonderful on it's own, but also lends itself well to a dollup of whipped cream.

Gram Danning's Fruit Kuchen: (makes one 9x9" square cake pan, or one 9" cake round)

1/4 cup sugar
2 Tbsp unsalted butter, at room temperature
1 egg
1/2 cup milk (or buttermilk, I am using buttermilk in mine)
1 cup flour
1 tsp baking powder
pinch of salt
sliced ripe fruit of your choice to cover the top of the batter (peaches, apricots, plums, strawberries, rhubarb, most fruits work very well with this)
cinnamon and sugar mix to cover the fruit
4 tbsp of butter to dot
_____________________________________
-Heat oven to 350f.
-Cream together the butter and sugar, add the egg and mix to blend.
-Add the milk, flour, baking powder and salt and mix until just blended.
-Spread the mixture into a greased 9x9 inch cake pan (or cake round or I used a 9" tart pan) and top with the ripe fruit. Sprinkle the cinnamon and sugar over the top (can be generous or light with this, depends on the ripeness of the fruit....I used a bit more today because of the tartness of the rhubarb). Dot the top of everything with the 4 Tbsp of butter.
-Bake the cake for 45 to 50 minutes, or until the cake is done and the fruit is bubbly.
-Cool and enjoy!

Happy Baking!

Technorati Tags:, , , , , , , ,
Generated By Technorati Tag Generator

Tuesday, June 05, 2007

Time to Make the Doughnuts (Donuts?)


Doughnuts, or Donuts. However you spell it they are tasty. They are not something one should make a regular diet out of, but in moderation they won't kill you. I don't believe I've had a doughnut in a few years so it seemed like now was as good a time as any to make some. I prefer the yeasted glazed doughnuts to the cake ones (although the cake ones are quite nice also). I have found that Alton Brown, of The Food Network, has a wonderfully delicious chocolate glaze that works beautifully on these. I also did a few jelly filled donuts just to round out the batch because if they have fruit in them, they must be healthy, right?

Yeasted Donuts:

2 1/4 tsp active dry yeast(1/4 ounce, one packet)
1 1/4 cups milk, warmed to about 100f
1 cup (8 ounces, 2 sticks) unsalted butter at room temperature
1/4 cup sugar
3 eggs
1 tsp salt
5 cups flour (I used 5 1/2 this time, you want a soft dough, but not so soft that you cannot knead it...so you might need a bit more or a bit less flour)
Oil for frying (I used a vegetable oil)
_______________________________
-Mix yeast and milk together and let it sit about 5 to 10 minutes until the yeast begins to bubble.
-Cream the butter and sugar together. Add the eggs, one at a time, mixing well after each addition. Add the salt.
-Mix in the flour alternating with the yeast mixture, so you are beginning and ending with the flour (1/3 flour, 1/2 yeast mixture, 1/3 flour, 1/2 yeast mixture, remaining 1/3 flour). You may need a little more flour if the dough seems too soft for you to knead.
-Turn the dough out onto a floured surface and knead until smooth and elastic (you may use your mixer with a dough hook attachment if you prefer, but I figure hand kneading is relaxing, and you'll burn calories while doing it thus justifying the need for a doughnut).
-Let rise, covered, in a bowl lightly sprayed with pan spray until doubled in bulk.

-On a floured surface, roll out about 1/2" thick, cut into rounds or squares, or whatever shape you like, I did the traditional round with the hole in the center for the glazed doughnuts, and just a plain round for the jelly filled (I didn't have a cutter specifically for doughnuts, so I used a drinking glass and a cannolli mold to cut out the centers).
-Cover with plastic wrap or a damp towel and let double in bulk again.
-Heat your oil to 375f in a heavy bottomed saucepan deep enough for the doughnuts to be able to rise to the top and float (you also don't want the oil up to the rim of the pan, you only want your pan filled halfway at most for safety).
-Carefully add the doughnuts to the oil. Brown on one side and turn the doughnuts
over to brown the other side (the best way to turn these is with two chopsticks, but tongs will work. Make sure when you turn your doughnuts over that you turn away from you so any oil that might be cheeky and splash, splashes away from you). Depending on the size of your pan you can do up to 3 doughnuts at a time. Drain the doughnuts on some paper towel. Glaze while still warm. If you fry up the holes (and why wouldn't you fry up the holes?), put some sugar (powdered sugar, cinnamon sugar, coconut, etc...) into a brown paper bag and when the holes come out of the oil, put them in the bag with the sugar and shake it up to coat them. You can also fill your doughnuts with a pastry bag fitted with a small plain tip and filled with jelly or your favorite custard filling (lemon curd is quite good in these, yum).

Alton Brown's Chocolate Doughnut Glaze (can also be found by doing a recipe search on Food Network):


1/2 cup unsalted butter
1/4 cup whole milk, warmed (I did not have whole milk so I used half heavy cream half 1% milk)
1 tablespoon light corn syrup
2 teaspoons vanilla extract
4 ounces bittersweet chocolate, chopped
2 cups confectioners' sugar, sifted
____________________________________________
-Place the butter, milk, corn syrup and vanilla extract in a saucepan and heat over medium until the butter melts.
-Turn the heat to low, add the chocolate and whisk until smooth.
-With the pan off the heat, whisk in the powdered sugar until smooth. Set glaze over a bowl of warm water to keep it fluid and dip doughnuts immediately.
-Allow the glaze to set up for about half hour (yeah, right....just try to resist the goodness) and eat!

Happy Baking...er...frying!

This post will also appear at Just Baking.


Technorati Tags:, , , , , , , , ,
Generated By Technorati Tag Generator

Saturday, May 26, 2007

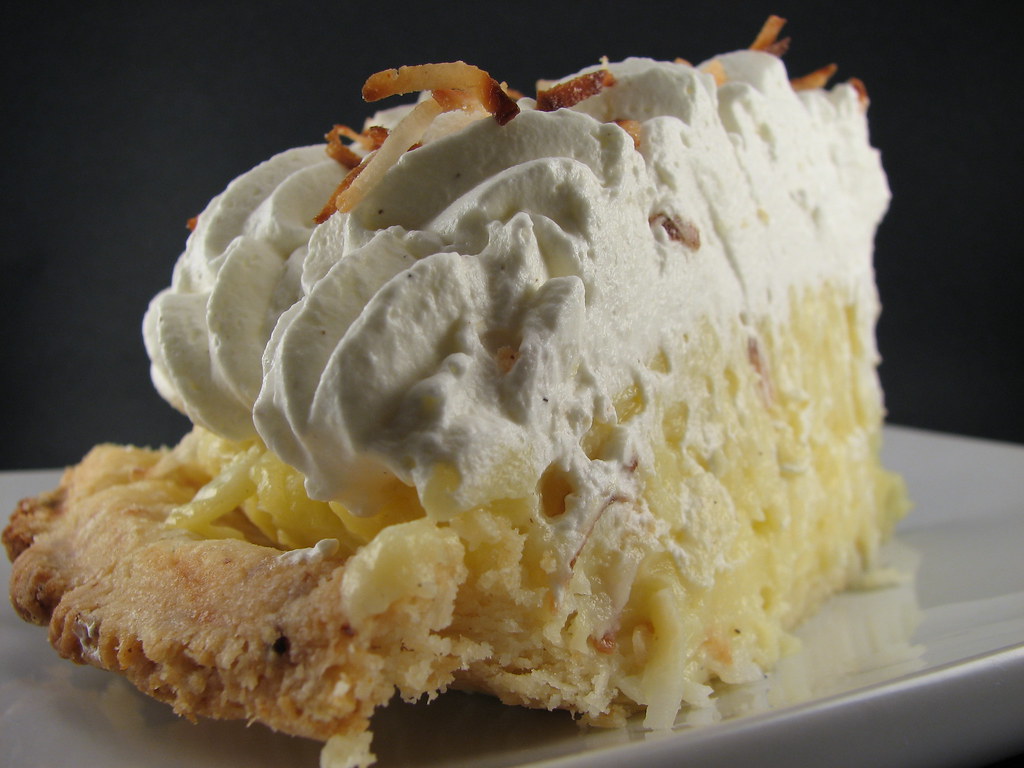
Coconut Cream Bliss...er...I Mean Pie....


I received an issue of Saveur Magazine in the mail a while ago, and it had me salivating. A coconut cream pie graced the cover. My first thought was "I must make this pie" my second thought was "thank you little Sis for getting me a gift subscription" my third thought was...well, I won't bore you with my lengthy thought process. The pie recipe is from the Agawam Diner in Rowley, Massachusetts. I have always loved a good cream pie, and coconut is my favorite of that particular type of pie (with chocolate cream being my second favorite, and banana cream following..someday I will combine the three into a super cream pie... and then I will take over the world).
The only change that I have made to this recipe is to use real heavy whipping cream instead of the recommended Dream Whip topping mix (the real whipped cream won't hold as long, but I don't care much for the mouth feel of the Dream Whip). This should make for a lovely cooling pie on a warm spring or summer day.

Coconut Cream Pie (from Saveur Magazine):

the crust:

1 cup pastry flour
1 Tbsp powdered milk
1 tsp salt
2/3 cups vegetable shortening (I'm using butter because that's the way I am)
_____________________________________
-Heat oven to 400f.
-Whisk together flour, powdered milk and salt in a bowl. Mix in cold shortening/butter until lumps the size of marbles form. Make a well in the center and add 3 Tbsp cold water. Mix gently until a soft dough forms. Pat dough into a 5" disk and set on a lightly floured surface.
-Roll the dough into an 11" circle and transfer to a 10" aluminum pie tin (the only pie tins of this type I could find were 8 3/4", this just made for a much fuller pie). Trim the edges of the dough and place another 10" pie tin on top sandwiching the dough, press down gently. Bake the pie shell upside down on a sheet pan until it is golden brown, about 20 to 25 minutes. Let cool, invert, and set aside.

Custard filling:

4 1/3 cups milk
1 1/3 cups sugar
1/2 cup cornstarch
6 eggs
Pinch of salt
1 cup sweetened coconut flakes
1 tsp vanilla extract of paste (this is my addition, just thought it would round it out nicely)
_____________________________________

-Bring the milk to a boil over medium high heat. While that is heating, in a large bowl whisk together the eggs, sugar, cornstarch and pinch of salt. Slowly pour the milk in a thin stream into the egg mixture while continually whisking (this will temper the eggs and keep them from curdling on you). Pour the mixture back in the pot and cook over medium heat,
stirring constantly, until very thick (about 10 to 15 minutes). Stir in the coconut and pour (well, scrape, it's very thick) the mixture into a large bowl (or I used a 9x13" pan for quicker cooling). Press plastic wrap onto the surface of the filling to prevent a skin from forming, and allow to cool to room temperature (this took about an hour in the 9x13" pan).
-Transfer the filling to the crust, smooth out the top, and if it's cool enough, Pipe with sweetened or unsweetened whipped cream and sprinkle on the coconut. I found mine to be a bit warm yet to pipe on the cream, so I covered it with plastic wrap and chilled it for an hour before topping. You may use "Dream Whip" topping instead if you wish.

This was a wonderful, rich, but not too sweet pie. Next time I make it, I may find a way to add a little more coconut flavor, but really this was fabulous as is.

Happy Baking, and Happy Memorial Day Weekend to all the Americans reading!

Technorati Tags:, , , , , , , , ,
Generated By Technorati Tag Generator